
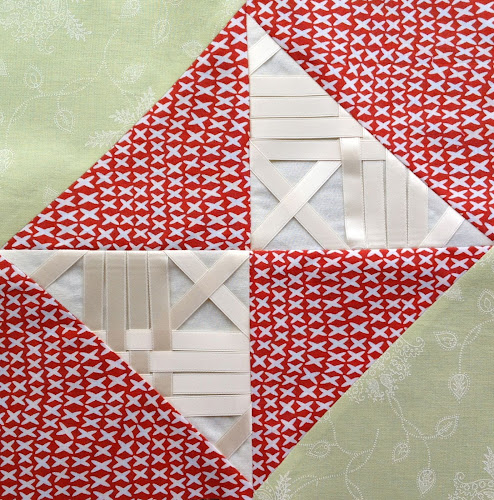
Close up

Block type: 4-patch
Block size: 10 1/2 inches
Colour scheme: reds, greens and neutrals
Texture/fabric manipulation: ribbon manipulation
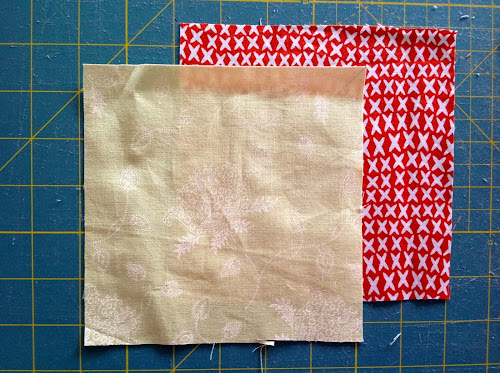
Cut:
- two red 6 in squares
- one 6 in green squares
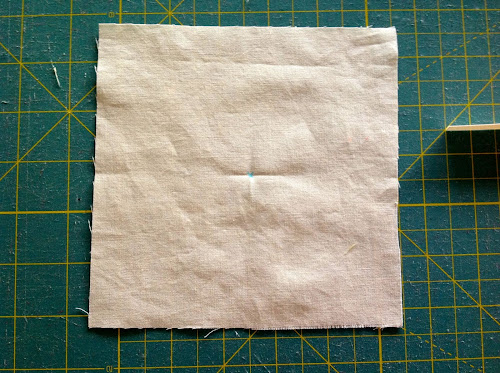
- one 6 in cream square
- approx 2 1/2 yards of 3/8 in cream ribbon
Making the netting
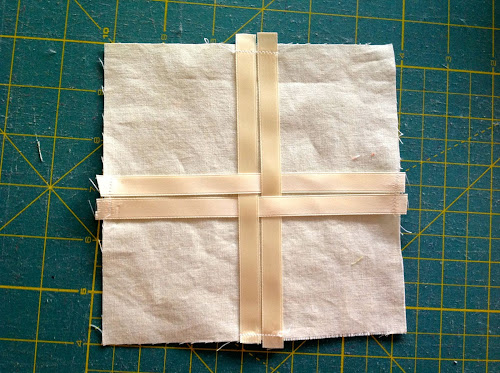
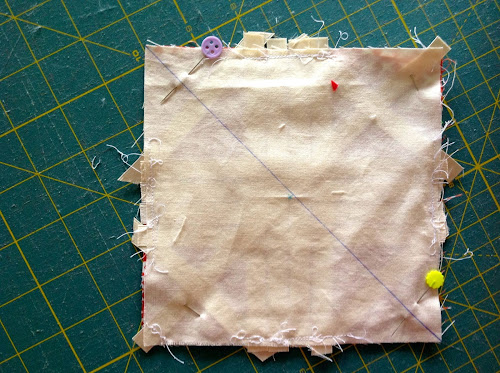
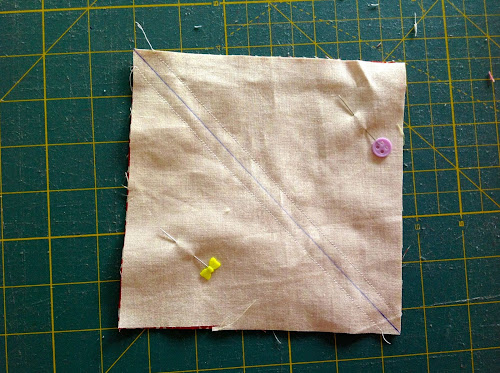
Take the cream square and make a mark in the middle for reference.
Cut the ribbon slightly longer than 6 in and place as per picture.
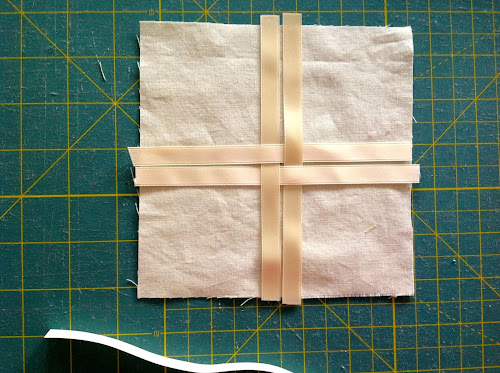
Pin to hold in place.
Stitch close to the edge.
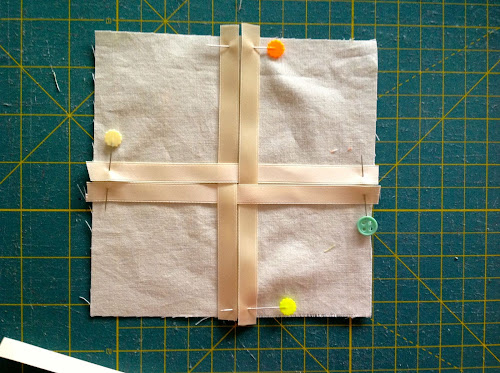
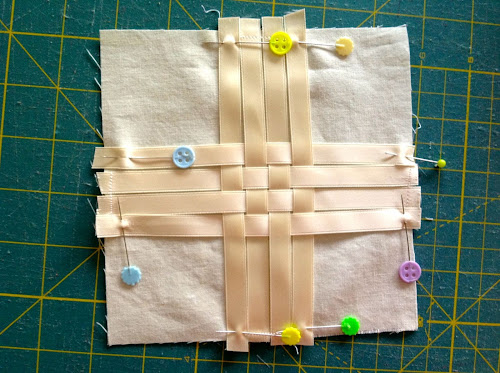
Add 2 more pieces of ribbon to each side making a weaving pattern and stitch in place again.
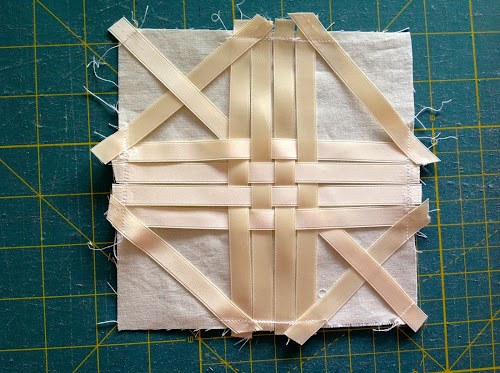
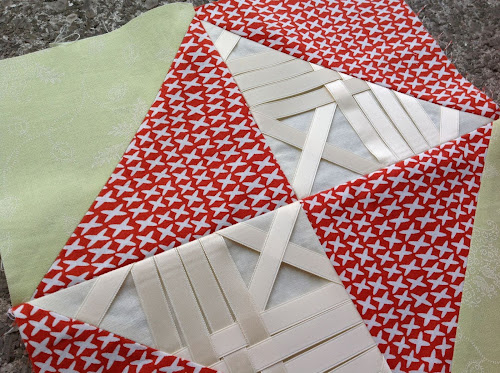
Now, finish the pattern as per picture below. As you can see I have left one side without crossing the ribbon because I’ll be cutting the square in half in that direction.
Place the pale green square on top of the ribbon face of the cream square, ie right sides facing together.
Draw a diagonal line on the side where the ribbon only crosses once as I described above.
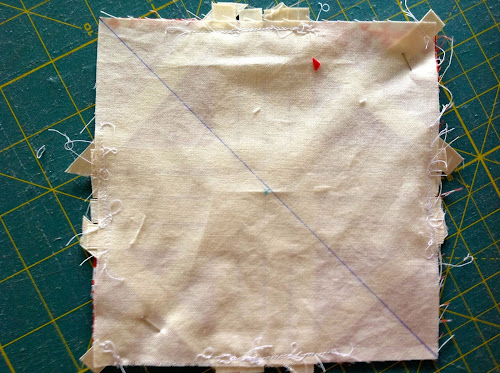
Pin to hold in place
Stitch on both sides at 1/4 in from the diagonal line. Cut through the line and press open.
Trim the ribbon bits off.
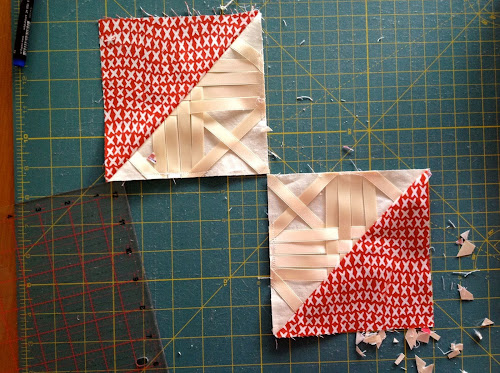
Now take a red and a green square.
Place them with right sides facing together. Trace a diagonal line, stitch at 1/4 in from the diagonal line on each side.
Now cut on the line.
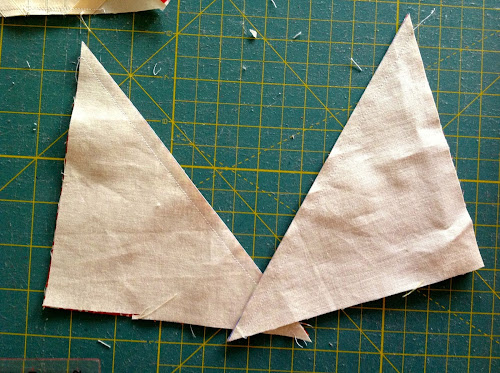
Place the pieces as per picture and stitch.
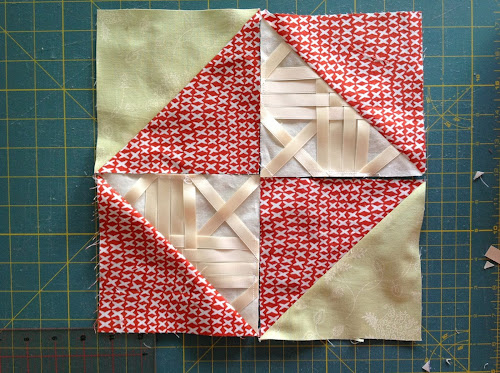
Here you have it.
Textured 4-patch quilt tutorial
This quilt has 16 x 10 1/2 in blocks.
Each block is a 4-patch block in greens and reds. The fabric manipulation is made in a cream fabric.
See all Textured 4-patch quilt tutorials.
See also my first Textured quilt sampler tutorial.
Share your pictures
Are you making this quilt? Share your pictures on Flickr’s TeresaDownUnder group.

Reblogged this on sewsassy1 and commented:
This really caught my eye and might actually get me quilting again. I want to use this technique in bags and one of a kind jackets and blouses. Thanks Teresa
LikeLike