

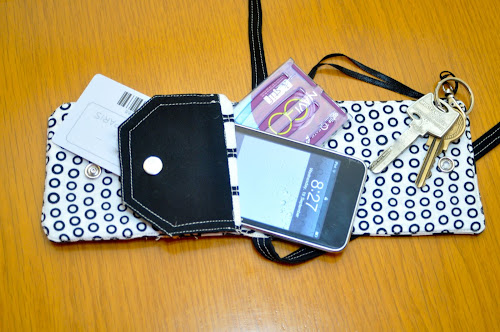
This is a tiny bag that can carry the essentials: a mobile, cards (credit card size), keys and money.
Cutting instructions
- 1 square, 4” x 5 1/2” for the inside flap
- 2 patches, 11” x 4” for back and front of bag
- 1 patch, 11” x 4” for the largest pocket with flap
- 1 square, 4” x 4” in plastic for a card pocket within the mobile pocket
- 1 strip, 4” x 1” for the plastic pocket border
- 2 patches, 4” x 8” for pockets
- 1 patch, 10 3/4” x 3 3/4” of fusible interfacing
- I strip, 43” x 1 1/2” for the strap
You will also need
- 1 key holder
- 2 fasteners
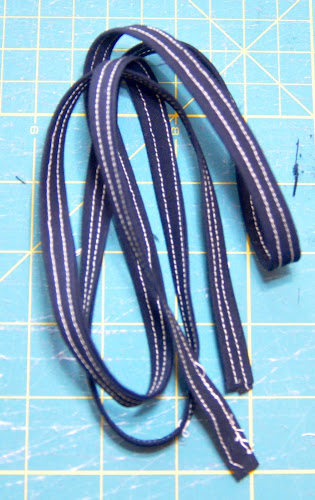
- ribbon
The number of pockets and their location can be adapted to suit your needs.
The bag is designed to hold magnetic cards on the back and flap so that the cards can be swiped without taking them out of the bag. The pocket for the mobile has an insert in plastic instead of fabric.
Cut a 11”x 4” rectangle and a black 4” x 5 1/2” rectangle.
Sew together in a tube as per picture.

At 2” from each top and side edges, trace a line and stitch across both sides forming a triangle.

Trim the corners at 1/4” from the line.

Stitch around the sides of the black flap with a 1/4” seam allowance.

Turn inside out and iron flat.
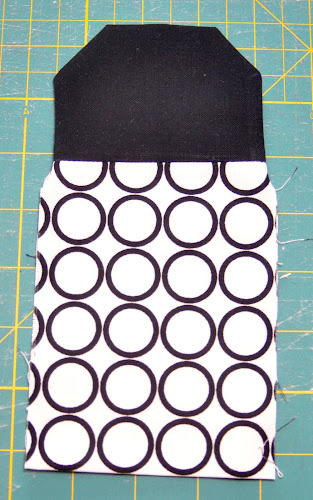
Top stitch around the edge and then at 1/4” from the edge as per picture.
Cut one 10 3/4” x 3 3/4” fusible interface rectangle and iron to the panel that will be the exterior of the bag.

Cut a 11” x 4” rectangle. We will attach the pockets to this side panel.

Cut 4” x 8” rectangle and fold in half. Iron. Then place it on the top of the panel as per picture with the fold facing away from the raw edge of the bottom panel.

Cut a 4” x 4” in plastic for a card pocket within the mobile pocket and a strip of fabric 4” x 1 1/2 “. Attach the strip of fabric to the plastic top.
Now place the plastic insert on the opposite edge of the back panel (see picture) with the fabric border towards the centre of the panel.

Now place the rectangle with the flap you made earlier on top of the plastic insert.
Cut a 4” x 8” rectangle, fold in half and press.
Place on top of the piece with the flap as per picture.

Cut a piece of ribbon about 4” long and attach a key holder to it. Place the ribbon on one side of the bottom panel as per picture.

Strap
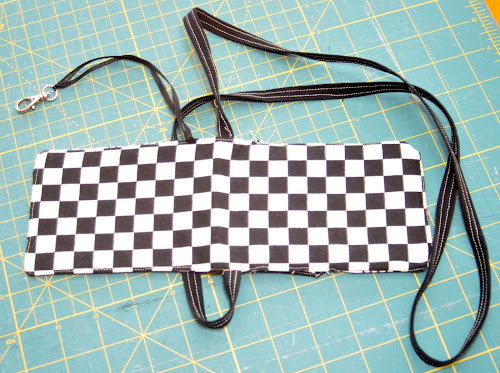
Cut a 44” x 1 1/2” piece of fabric and iron as per picture, first 1/4” from each side towards the middle and then in half again. Press well.

Stitch around both edges of the strap.
Fold the bottom panel in half and pin each side as per photo. This is where the strap goes.

Now pin everything in place well making sure the black flap and strap doesn’t get in the way when stitching around the edges.

Place the front panel with the interfacing on top of the bottom panel as per picture.

Stitch all around leaving a 2” opening on one of the narrow sides.

Now turn inside out. This is not an easy task!

Nearly there.

Iron well.

Stitch all around the bag closing the opening as you do this.
You can see the inside plastic pocket here.

Now you need to add 2 fasteners, one to the black flap and the other to the external flap.
The fastener is not visible from the external flap as I added it from within the pocket.

The inside flap has the fastener visible as it adds some interest to the bag.

The lenght of the strap can be adjusted.


Love this! Your tutorials are clear and concise. So understandable! More like this please and thank you!
LikeLiked by 1 person