


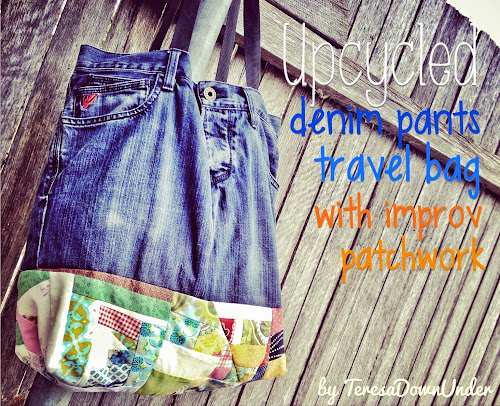
This is not only a bag with improv patchwork but also a sort of improv travel bag too. I don’t have any clue about how to construct pants or any garment. The way I went about doing this was rather approximate as you will see. I am not going to give any sizes of fabric, jeans or whatever because it will depend on the size of the pants you use. Before you start, align the top of the waist jeans together and pin. Believe me it makes things better if you do this. 
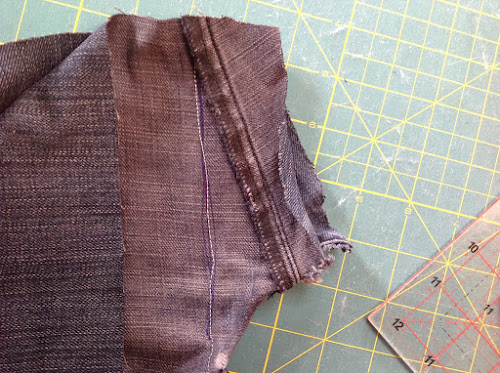
I started with an old pair of jean. This pair in particular had pockets lower than the start of the legs. I wanted to preserve the pockets so I cut the pants lower than the pockets.
Then I cut each leg bit individually as per picture. 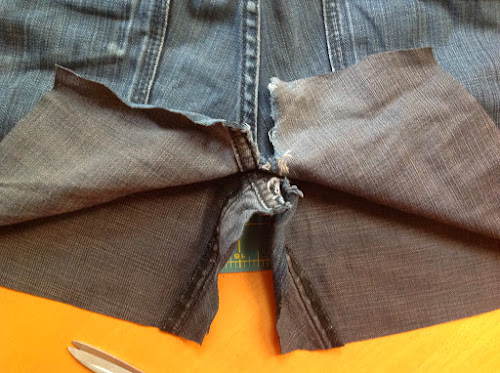
I pinned both sides, from each leg together. The point of this exercise was to get a straight piece of jeans. I drew a straight line of where the seam should go.
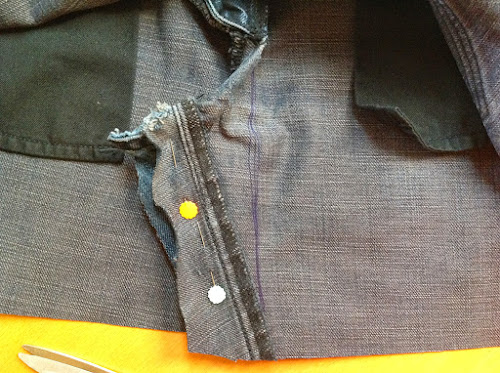
I stitched along the line.
I turned the pants around and did the same thing on the other side. In both instances excess fabric needs to be trimmed off. 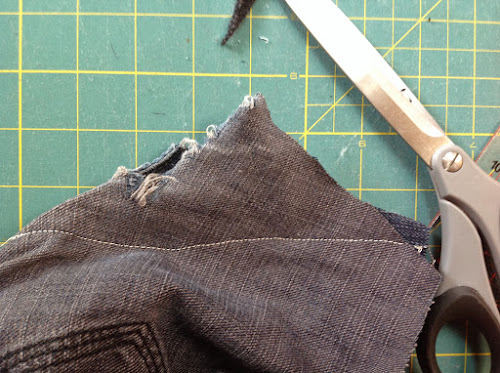
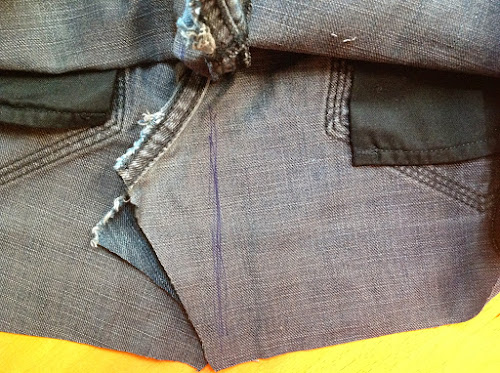
This is the resulting piece from step one.

Now trim both front and back as per picture. Make sure the rectangle is the same height on both right and left side.

Improv patchwork
There’re many of ways of doing improv patchwork. I have posted tutorials on improv patchwork before. For this bag, I stitched pieces of fabric together of approximately the same length until I got a bigger piece. Then I put it aside.

I continued to stitch bigger pieces from smaller pieces.


You will need to trim pieces as you continue to piece. For instance I stitched a rectangle on an an angle in the piece below.

Then I trimmed it to fit with the rectangular shape of the larger piece. I usually try to get to a rectangular or square piece because then it is easier to assemble the different pieces.

By this stage I thought I’d have enough for the bottom of the bag.

I started to assemble the pieces and trimming them into a rectangle.
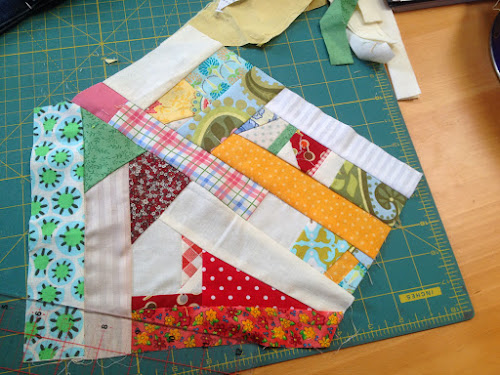
When you trim your pieces they can be reused to square other improv pieces. Do not throw anything away.
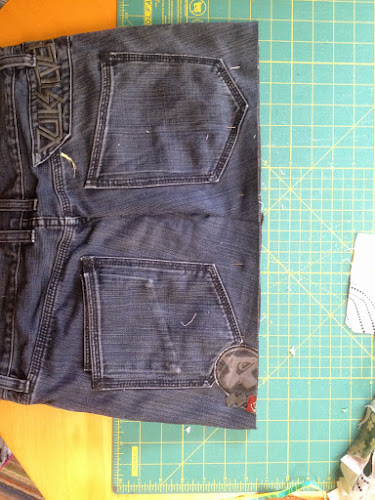
 Prepare the denim pants.
You need to decide how big you want your bag to be and then decide on the size of your improv patchwork piece. My improv patchwork is about 7 inches wide by the width of the pants. I made a large strip/rectangle and stitched it into a tube. Then I placed the pants inside the patchwork tube and aligned the bottom edge.

I pinned well.

I stitched along the edge leaving 1/4in seam allowance.

That’s it. The bottom is attached. I pressed the seam well.

Then I turned the bag inside out and pinned along the bottom edge to make the exterior sac.

I stitched all along the bottom edge leaving 1/4 inch allowance.

Time to box the corners of the bag. My photos aren’t great on this step so if they don’t make any sense please check Sew 4 home tutorial. Place the bag as per picture below and mark 2 1/2 in from the corner.

Stitch along the line and cut off excess fabric. 
Do on both sides and voilà! Done! 
Lining
Usually I stitch the lining by machine but this time I don’t want to stitch the lining all the way to the top of the bag but just up to the waist band so I hand stitched the lining. Also I added batting to the lining for the same reason I hand stitched it to the bag.

I measured the bag and cut 2 lining pieces in quilting cotton. I squilted both pieces separately. 
Then I placed both pieces right sides facing together and stitched around 3 sides leaving the side that will go up open. 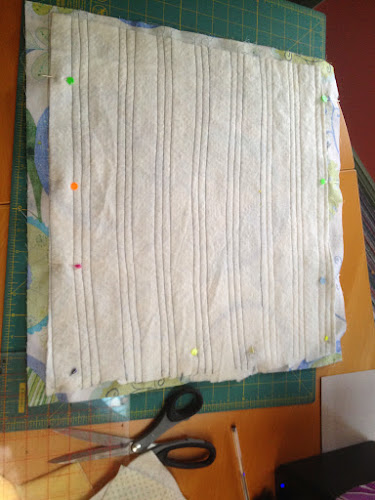
The lining also needs to have boxed corners. Do as you did for the bag. 

The handles are heavy duty and store bought. I’m tired of my handles and straps deteriorating within a few months of using a bag.  Place the handles about 6 inches apart.
  Pin.
Pin.  And stitch now.
Place the lining inside the bag, fold the top in and slip stitch around the waist.
 Done!
Done! 
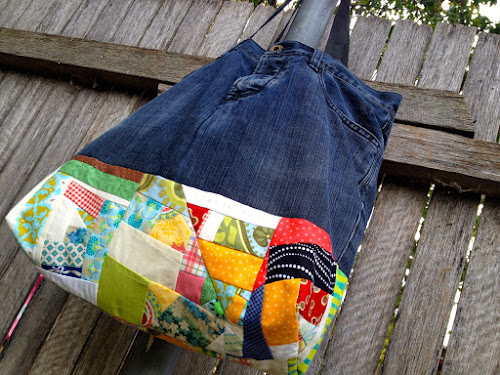
This is it.

Big enough as a weekend bag or a beach bag. 

Great idea! Thanks for the tutorial.
LikeLiked by 1 person
I made a bag like this from an old pair of jeans I bought in the op shop when I was a teenager! Instead of a patchwork base, I used part of the leg. I remember adding colourful patches, buttons and embroidery … I was just a kid!
LikeLiked by 1 person
Great things you could do with jeans. It’s a pity to throw them away when they can’t be mended. I still have the legs. I’ll be using them for something else. I still have to use this bag too!
LikeLike
You will have to go check out what Serena of Sew Giving has made so far with one pair of maternity pants!
LikeLiked by 1 person
I had a look at that just now! The pouch looks great and very practical. I’ve also made a coin purse with this pair of jeans, and I’ve used half inch hexies to embellish. I have to post the tutorial. I quite like this repurposing thing.
LikeLike
Thanks for this great tutorial. We women never have enough purses and bags, lol.
LikeLiked by 1 person
Saw this on craftgossip. I love upcycling with denim and I love what you have done here combining it with patchwork fabric.
LikeLiked by 1 person
Thank you Claire
LikeLike
Have you tried making your straps from the legs you cut off the jeans? I would think they would wear well.
LikeLike
Susan I didn’t use denim for the straps because my machine doesn’t like thick layers of fabric but otherwise denim would have been my choice. 😊
LikeLike
Love this bag. I am now using old jeans to make bag totes and etc. Really is fun. Will add one more. Thanks
LikeLiked by 1 person
Have fun with it 👍
LikeLike