
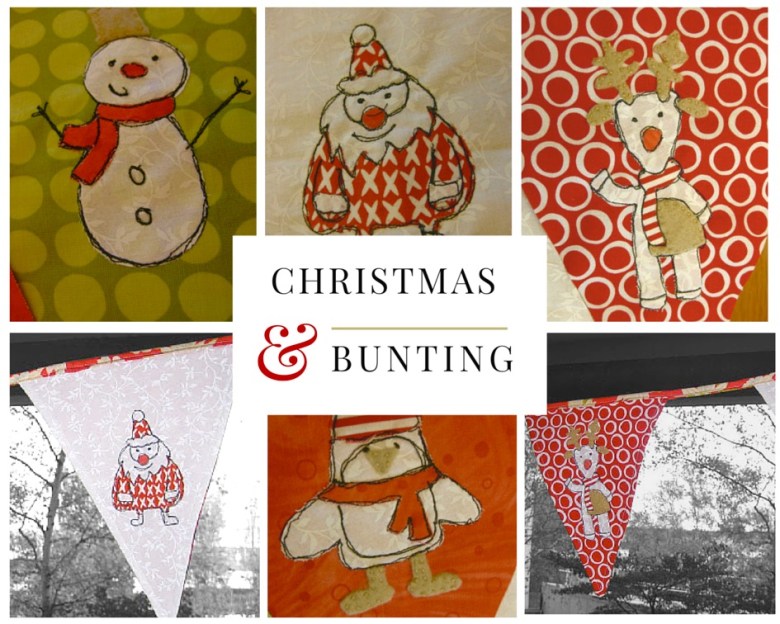
This tutorial is in 2 parts. The first part will only deal with the applique of Christmas designs and the next tutorial will deal with the stitching of the lettering and putting everything together. The bunting is about 140 inches long.
Patterns
- Download free Christmas vectors (zip) from Spoongraphics for your applique
- Download my bunting template (pdf). When cutting this pattern add 1¼ all around for seam allowance
Fabric needs
- assorted scrap fabric in white and red for the applique. Use fabrics that will have enough contrast so the design shows through
- assorted scrap fabric in white, green and red for the triangles
- lightweight fusible interfacing for the flags
- black thread
- felt scraps in beige
- stranded cotton in beige
- double sided interfacing for the applique
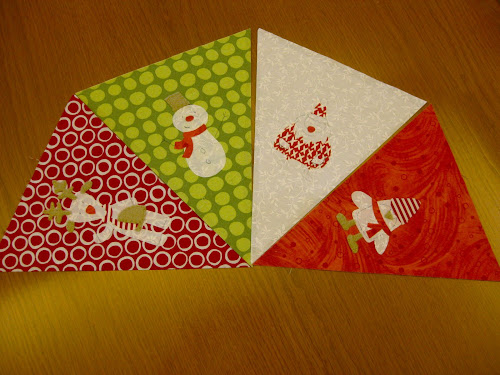
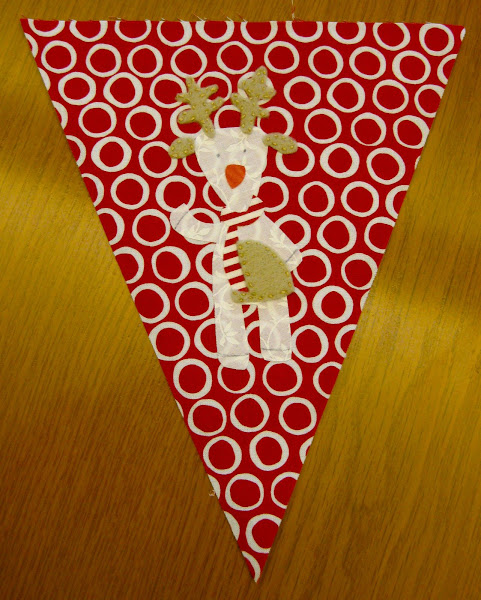
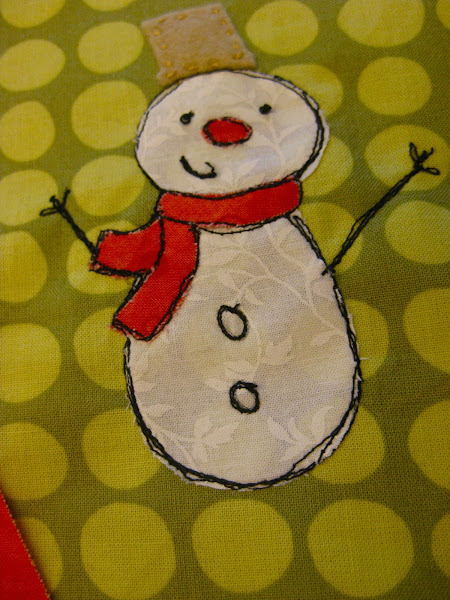
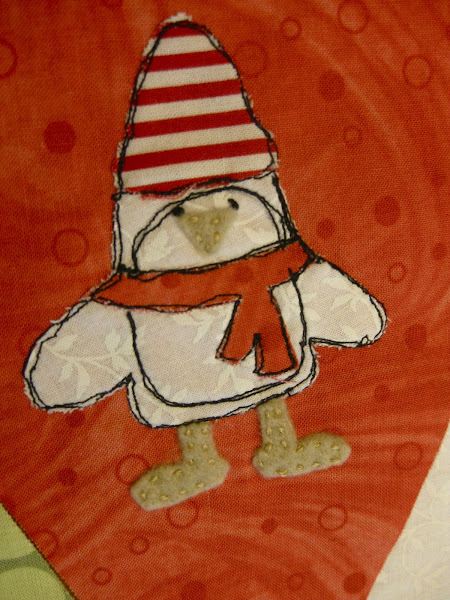
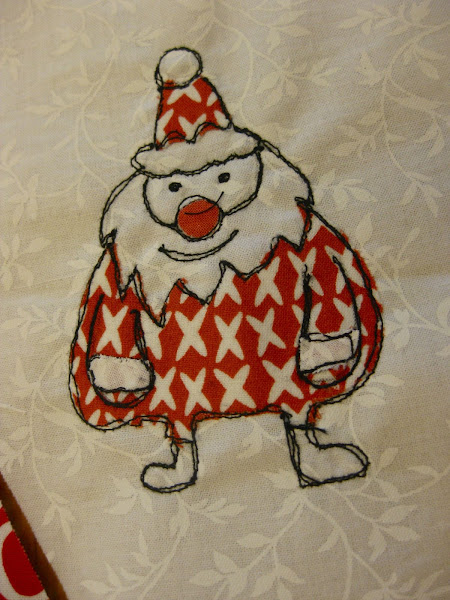
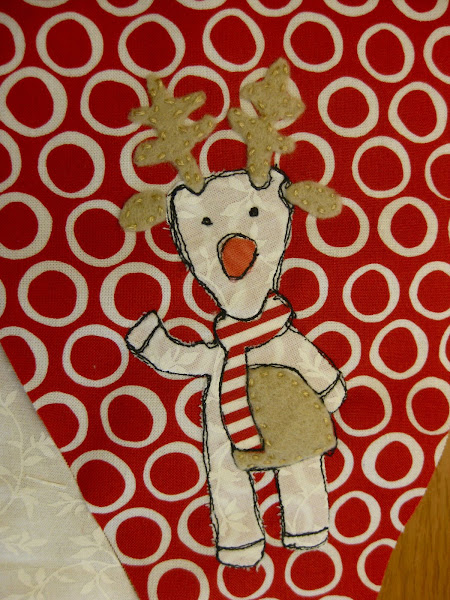
You can choose how much of the design you want to applique. Below you will find a close up picture of each flag where you can see what parts of each drawing I chose to fuse and applique.
Tracing and fusing the applique
Trace the applique on to the double sided interfacing. I only used interfacing for cotton fabrics. The felt pieces weren’t fused, just pinned in place and stitched by hand.
Cut each shape roughly leaving some space around each shape and fuse to the fabric, then to the triangles following the manufacturer’s instructions. I used Heat’n Bond, the light variety.
After ironing, cut each shape and place on the flag. Place all shapes together and fuse at once.
Draw the eyes, the snowman buttons and any other lines you will be stitching along.
After the fabric is fused, cut the felt pieces and stitch to the design. See the picture below for an example. Notice where I have drawn some lines on the reindeer legs.
Now iron on the lightweight fusible interfacing to the back of the triangle. The interfacing will make the bunting sit better but it will also act as stabiliser for the applique.
Now the fun part starts. Using black thread stitch all around the applique edges as in the original paper sketches. Don’t worry if your lines aren’t straight, mine are pretty rough. This is the first time I’ve used this technique so it was expected. Go around each line at least twice. I used the darning foot but didn’t lower the dogs so I could move the fabric enough. I found that I didn’t have so much control with the dogs down.
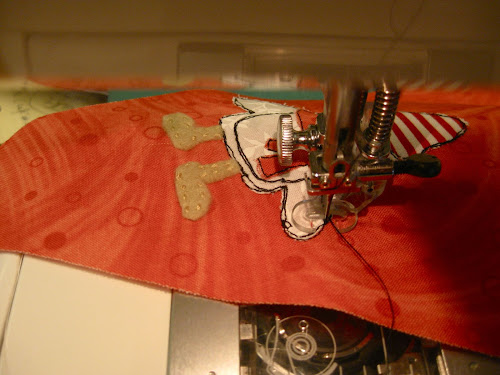
You will end up with a lot of threads at the end of it. Just cut them close to the fabric.
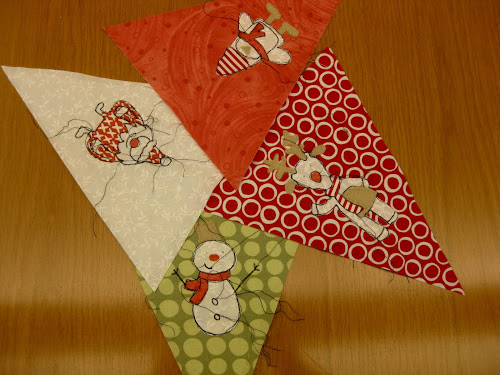
All done. I must admit I was a bit scared it would turn out to be a disaster but I quite like the result.

Close ups

These are adorable. I thought it looked too hard, but when I read your tutorial I realised that I could definitely do this. So cute. Thanks.
LikeLiked by 1 person
Love these – especially the penguin – I am making one today!
LikeLiked by 1 person
Teresa, this is a great design idea for applique…love the free-hand style, which I’m very comfortable with when quilting. Question though: can you help me understand the purpose of the double-sided interfacing? I am new to machine applique and could use just a little additional coaching. THANK YOU!
LikeLiked by 1 person
Ding, ding, ding! Just figured it out. This is what I get for reading tutorials too close to bedtime. 😛
LikeLiked by 1 person
No worries Rhonda. Have fun with the project.
LikeLike