
I used 5 fat quarters in assorted blue and pink colours, one sided fusible interface and 2 sided fusible paper for the letters, and 3 metres of blue ribbon.
Seam allowances are 1/4′.
You can use the bunting templates (pdf) I used or draw your own.
Cut as many triangles of you need, two per flag of fabric and one per flag of fusible interface.
The letters should be traced as if seen from the back so when they are fused they display the right way.
Cut the letters, if you’ll be using any and fuse them to the right side of the fabric.

Iron the fusible interface to the wrong side of each flag and fuse a letter in place.

Applique the letters at this stage. Stabiliser is not necessary.
Place both sides of each flag right sides together and stitch with a 1/4′ seam. Snip the corner so it’s crisp when turned inside out.
Turn inside out and iron. Top stich 1/4′ from the edge.

Measure the distance between flags and pin flags in place.
Stitch to the ribbon.
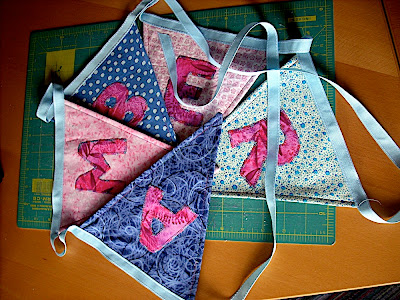
Voila.

And another example.


I LOVE this idea! Thank you!!
LikeLike
Hello, I love your tutorials, they are so easy to follow and wish to thank you for all your kind information that you share. best wishes, Annie
LikeLike
Thank you Annie!
LikeLike
Awesome drawing information, really inspiring!
LikeLike