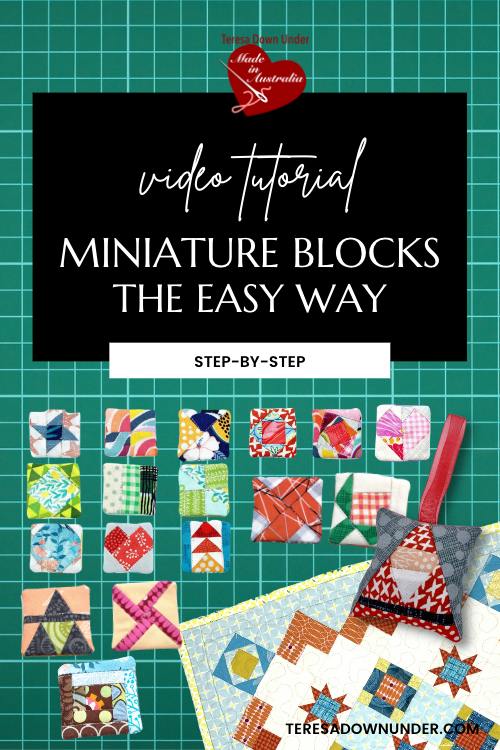
Working with tiny blocks can be fiddly, but using foundation paper piecing (FPP) makes the process much easier and gives you cleaner, more precise results than traditional piecing methods.
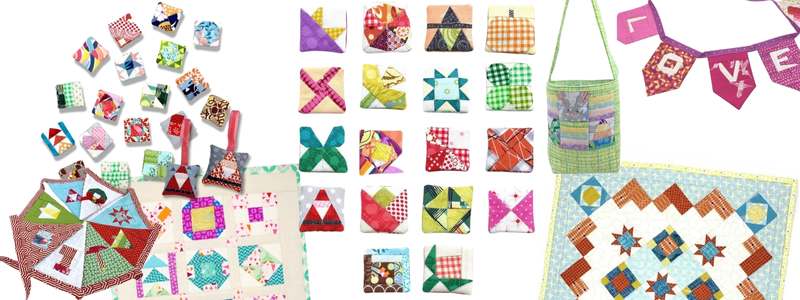
In today’s tutorial, I’ll walk you through how to make a small 2” quilt block using FPP, and then show you how to turn it into a fabric brooch. Don’t want a brooch? No problem — you can also use the finished block to make a fridge magnet, pin, or even a mini quilt for your wall.
It’s a great project to use up small fabric scraps, try new techniques on a small scale, and make something fun and giftable.
Try it!
You can download the sample block on the video for free to try out:
Buy the sets
Santa ornaments and brooch
Santa templates
Download Santa templates (pdf)
Poppy
Poppy templates
Download poppy templates (pdf) and video tutorial.
Halloween templates
Download halloween templates (pdf).
What you need
Foundation paper piecing
Sewing through paper method
I used regular copy paper but you may find it to be a bit thick.
You can use special paper for foundation piecing if you prefer.
Freezer paper method
Freezer paper for printing. This is my favourite. No need to trace. Just put it in your printer and print to it. It’s so easy and accurate.
Freezer paper on a roll. You can use the roll for tracing and also for printing and of course for tracing. When printing, cut a piece the same size as the copy paper, press on to the copy paper and just print on the mat side of the freezer paper. Don’t press for too long or it may stick to the paper permanently. You can guess why I know this.
Ruler
A follower recommended Add a quarter ruler, the yellow ruler in the video. I’ve been using for a few years now. If you do a lot of foundation it’s a must have.