

This is the first tutorial in a series of three that makes a Christmas themed lap quilt.
Part one: quilt top assembly
Part two: embroidery embellishments
Part three: improv patchwork back of quilt
Quilt top pattern
The quilt top has a zig zag or chevron pattern with a Christmas theme.
Finished size: 51 in x 53.5 in
Needs for the quilt top
- 81 x 5 inch square charms or two charm packs (typically charm packs contain 42 x 5 in squares)
- White fabric:
- 162 4 1/2 in x 2 1/2 in rectangles
- 18 x 6 1/2 in square for the large on point triangles
- 2 x 3 3/4 squares for the corners small triangles
Important: do not throw away any of the charm squares trimmings. They will be used in the backing of the quilt.
The layout is very basic and is made of 2 rectangles of contrasting fabric stitched together.
Block construction
For each block, trim 1/2 inch off one side of the 5in charm square. You will obtain a 5in x 4.5in rectangle.
Then cut the resulting rectangle in two again so that you have 2 rectangles measuring 2.5 in x 4.5in each.
For each rectangle cut an equal rectangle 2.5in x 4.5in in white.
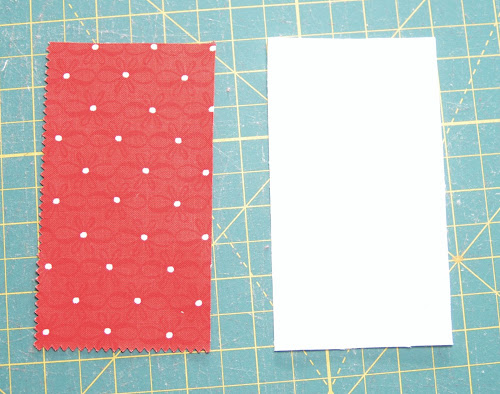
Stitch both rectangles together. You have one block.

Number of blocks: 162 blocks
Block placement
Place the blocks in a zig zag way as per diagram below.
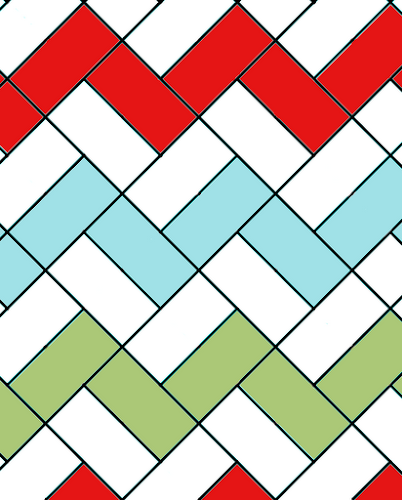
The quilt is set on point. This tutorial illustrates what set on point is. Basically you sew the quilt in rows in the diagonal with each row starting with a triangle.
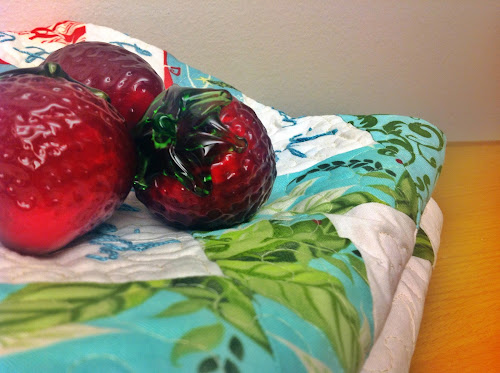
In this quilt, after you place all blocks as per diagram above you will end up with 2 corners where you will place 2 large triangles together to make a larger triangle (see first photo – the top corners in the photo are made of 2 large triangles). And you will have two more corners with just one small triangles ( and the bottom corners use the 2 small triangles).


The top is now completed.
In part two we will embellish the top.

Great tutorial. Love the simplicity of the pattern. Thanks.
LikeLike
Chervon fabric is so popular right now, this would make a perfect gift for someone who really likes the fabric pattern. I use jelly roll fabric or cut 45″ wide x 2 1/2″ strips of fabric, sew the long strips together then cut them into 4 1/2 rectangles. Makes precious baby quilts too. Can’t wait to see what quilting you use and how you finish the backing with scraps!
LikeLike
The back is going to be…. interesting!
LikeLike
oh goodness that is so beautiful!
LikeLike
Soooo much easier than HST, thank you.
LikeLike
Beautiful! I really like this. Great job!
LikeLike
Thanks for sharing your tutorial. I have linked to you over at Freebies For Crafters.
Kind Regards Khris
LikeLike
I’ll be making your quilt very soon it certainly looks easy and quite quick to run up , it’s very
effective I really like the zigzag pattern it will be a way to use up some of my stash,thank
You for you tutorial.
LikeLike