

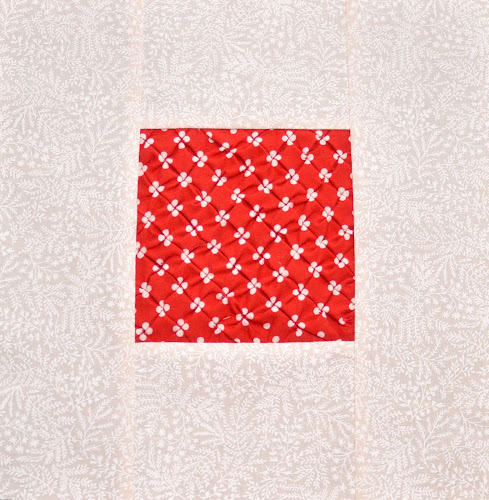
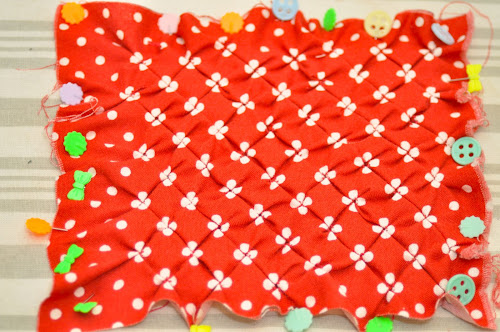
Close up
Block type: log cabin
Block size: 11 inches
Colour scheme: reds and neutrals
Texture/fabric manipulation: diamond smocking
Quilt size: The finished quilt is 52 1/2 x 52 1/2.
Needs:
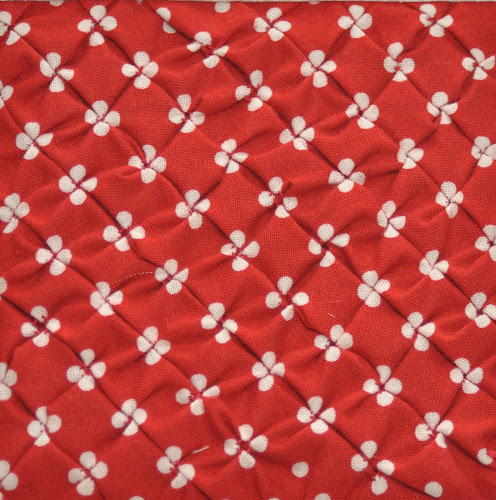
- 8 in x 8 in rectangle in red fabric for the textured centre square
- two 5 in x 3 1/2 in rectangles and two 11 in x 3 1/2 in rectangles for the border
Diagram
Draw your dots apart as per pattern spacing dots at 1 inch intervals.
Sew the texture from the right side of the fabric.

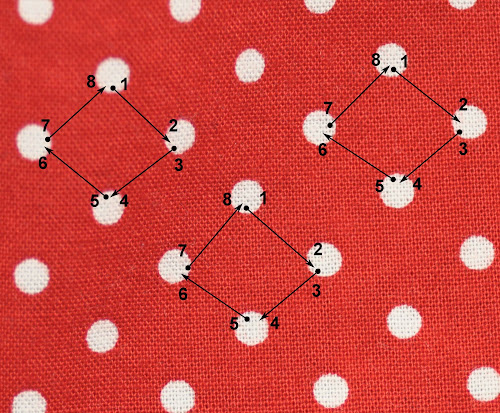
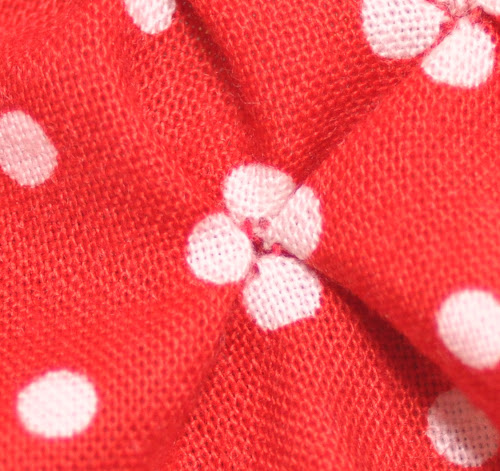
Using a polka dot pattern
If using a polka dot pattern or a symmetrical pattern you won’t need to draw the diagram. Use the pattern itself to guide you through the stitching.
Using a symmetrical fabric pattern
Start by pushing the needle from the back of the fabric and through point 1 (see picture and diagram). Then pull the thread out and put the thread through point 2 and then come out to the top of the fabric through dot 3 and so on (see picture).
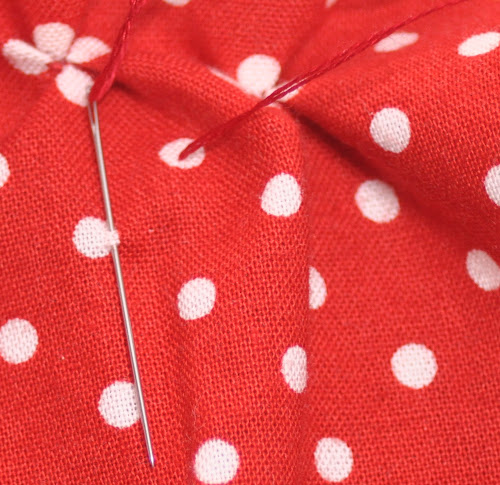
On dot 8 put the needle through to the back of the fabric.
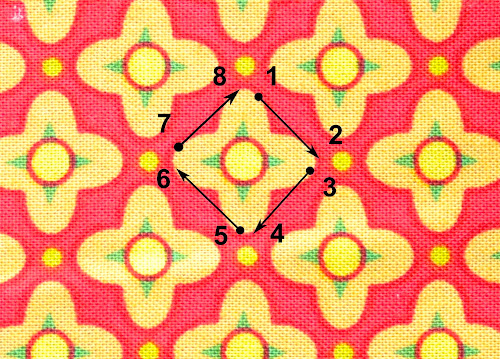
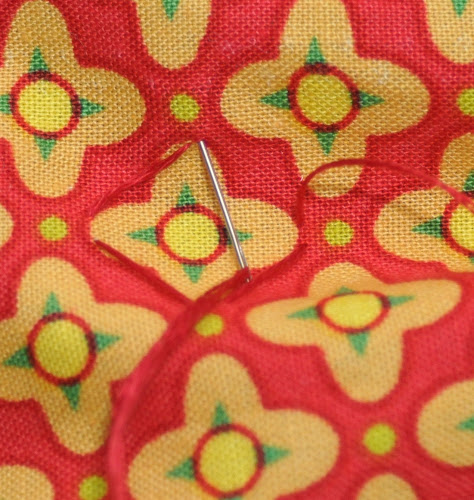
See how it can be done with another symmetrical pattern. Just pick up the corner points of the pattern that will form a diamond.
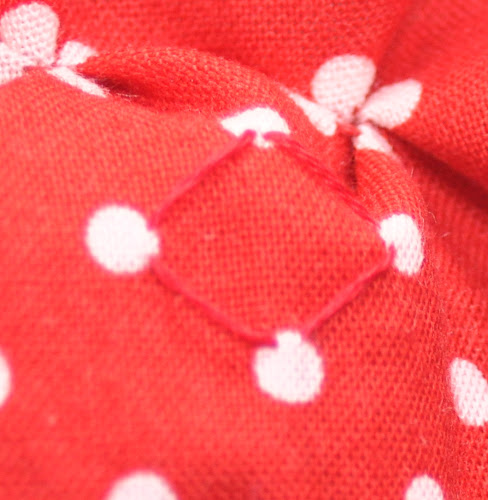
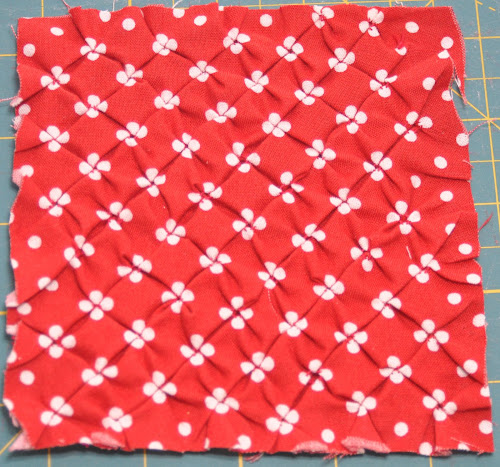
Pull all dots together.
Do a back stitch on the back of the fabric and cut the thread.
Start again with the next diamond. Measure from time to time to see when you reach 5 in x 5 in of the smocking pattern.

After you have 5 in x 5 in of smocking, stretch the piece on a padded surface or ironing board using pins and steam it with your iron. Do not press. Let it dry.
Square the smocking piece to 5 in x 5 in square.
And the result with another pattern. The diamonds are twice as large on the pattern below.

Now cut two 5 in x 3 1/2 in rectangles and two 11 in x 3 1/2 in rectangles for the border.
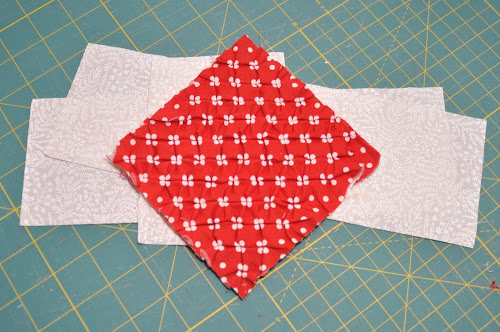
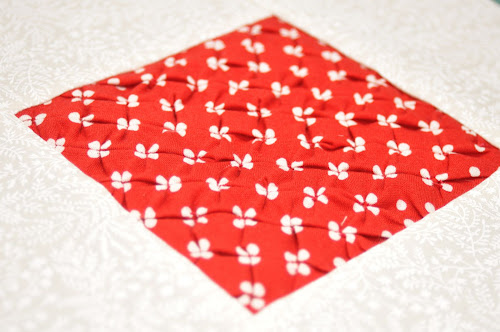
Stitch the border.
You are done!
Textured blocks tutorials
This is the 15th block in a series of 25 exploring texture in fabric.
Each block is made out of a centre 5 inch square featuring some fabric texture such as pin tucks, smocking, shirring and the like. Then a 3 1/2 wide border encloses each centre square.
The colour scheme is red and white/cream alternating reds and white/cream for the centre square and border.
Some of the textures show better on plain colours than on heavily patterned fabric.
See all Textured quilt sampler tutorials for this quilt.
Share your pictures
Are you making this quilt? Share your pictures on Flickr’s TeresaDownUnder group.

Oh my God! I never saw a work like this! WONDERFUL!!!!!!!
LikeLike
Terrific tutorial, thanks!
LikeLike