
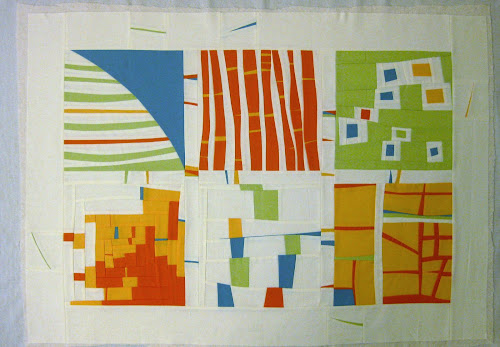
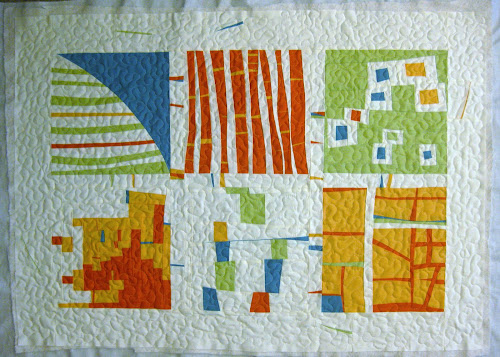
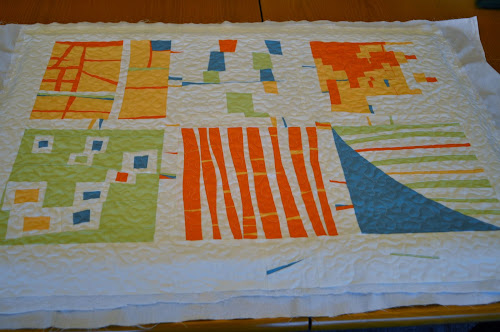
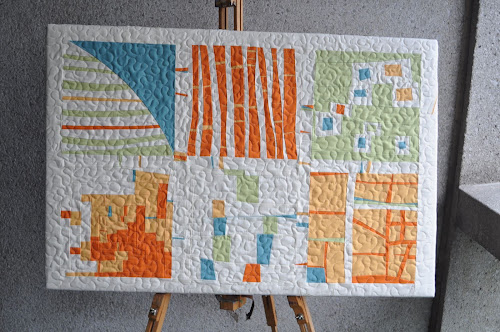
I made this improv quilt in 2012.
Here’s how I made it:
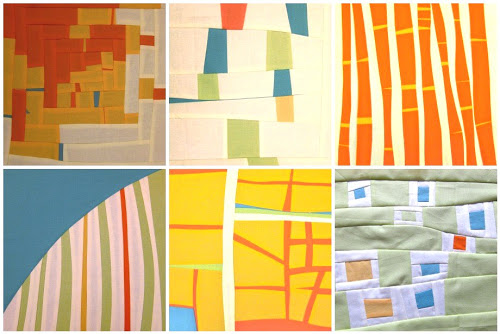
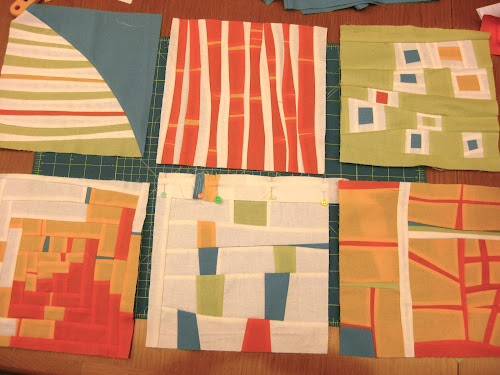
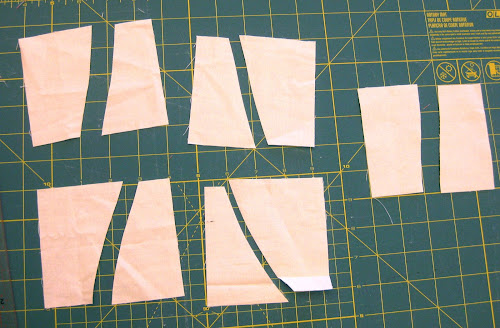
How to make the blocks
- improv / free form quilt block number 1
- improv / free form quilt block number 2
- improv / free form quilt block number 3
- improv / free form quilt block number 4
- improv / free form quilt block number 5
- improv / free form quilt block number 6
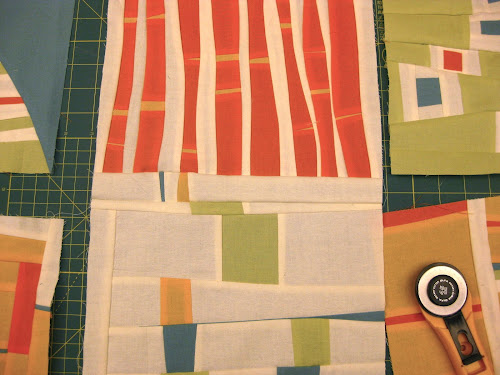
Adding sashing
I made 4 strips of sashing, larger than required and then trimmed each strip as I added the sashing.

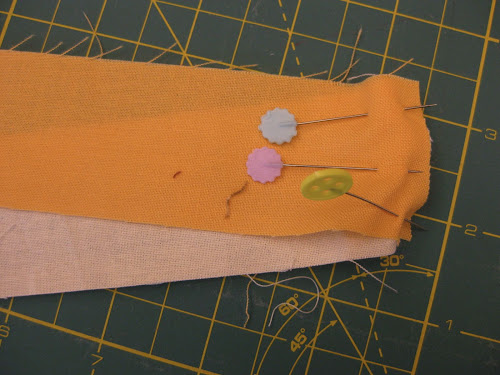
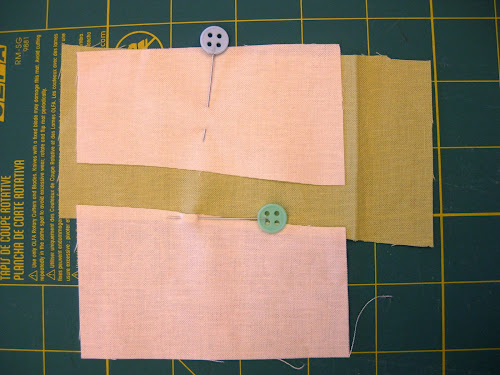
Making the sashing
Sashing is made of 2 inch cream strips with some touches of colour.
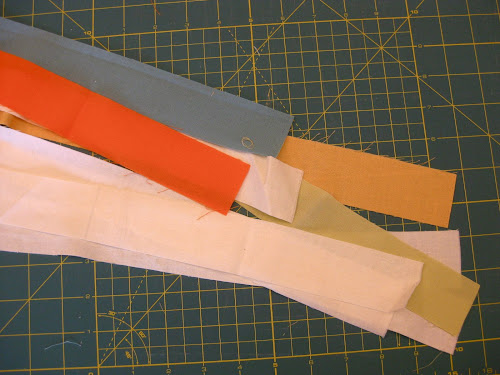
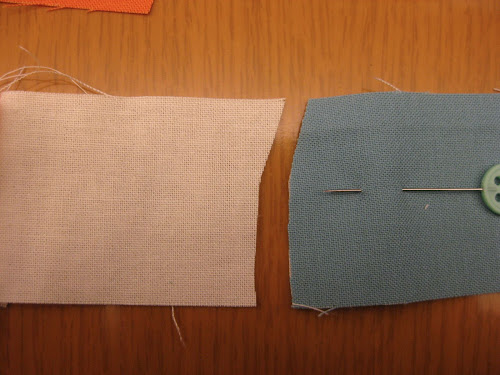
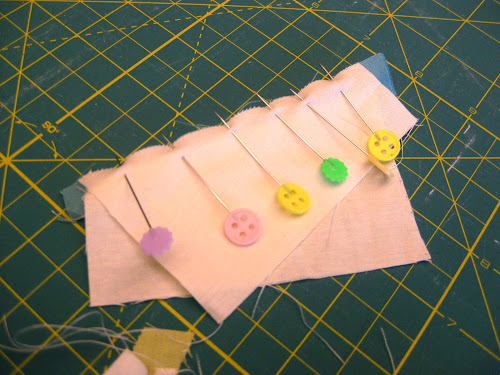
Place the cream strip below the colour strip and make a cut like below.
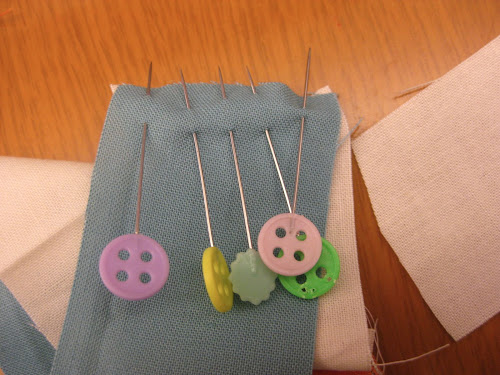
Pin well together and stitch.
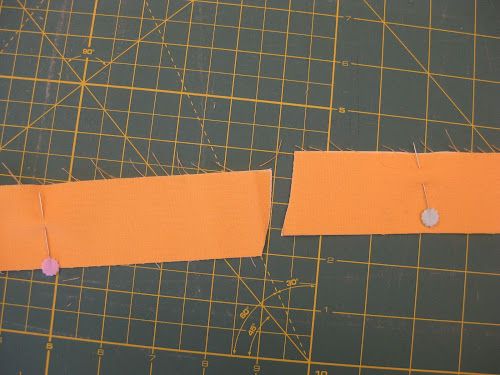
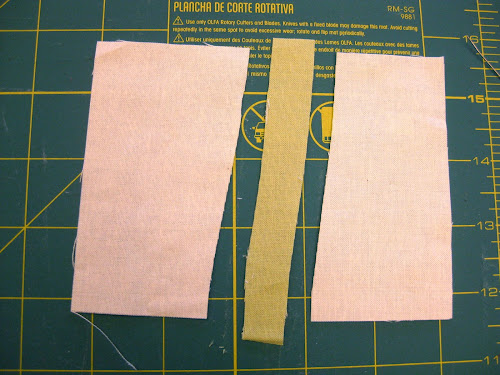
Then place the cream strip on top of the colour strip and cut along the line.

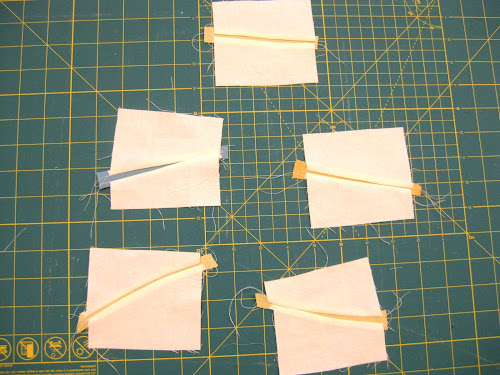
Now put both coloured and cream strips together.
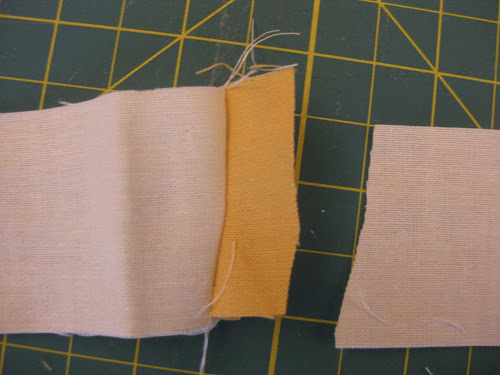
Pin well.

Stitch and iron flat.
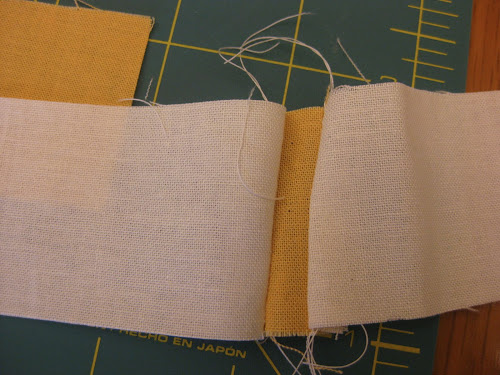
Now do the same with another colour.
Cut together to make sure that cutting lines match.
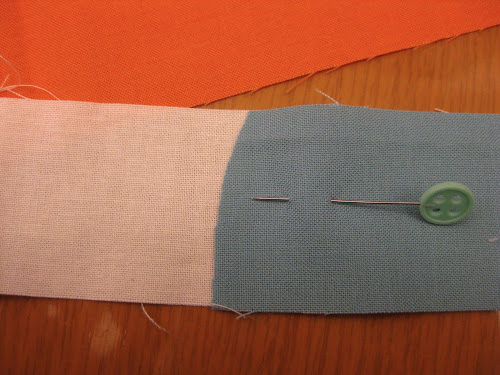
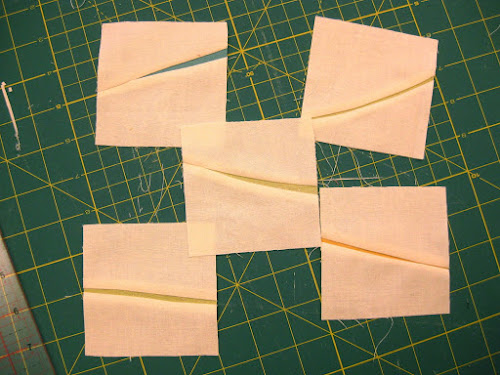
The curvier the edge the more pins you will need to ensure the seam lies flat when stitched.
Iron the sashing well before sewing to the blocks.
Add sashing to blocks.
Pin one strip to the top of one block and stitch.

Trim excess off.

Stitch sashing to the next block.
Continue adding strips and trimming.

Border
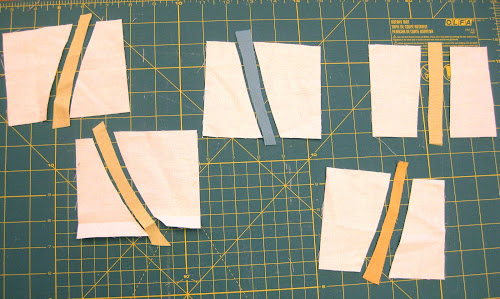
The border is 3 1/2 inches wide. Cut 5 x 4 inch squares and make a cut across each of them.
Cut now a narrow strip in a coloured fabric by placing the piece of fabric as per picture below.
Cut along each line on the sides.
Do the same for all squares.
Pin and stitch together.
Iron flat.
Trim to 3 1/2 inches.
Place the squares around the border and sew to strips of fabric 3 1/2 wide.

Stitch the border to the assembled blocks.
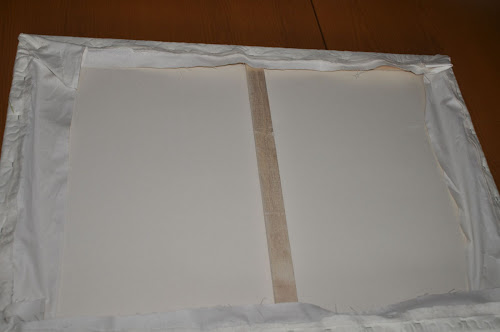
Make a quilt sandwich. I used calico for the backing and cotton batting.
Pin all three layers together.

Quilt the sandwich. I stipple quilted it.
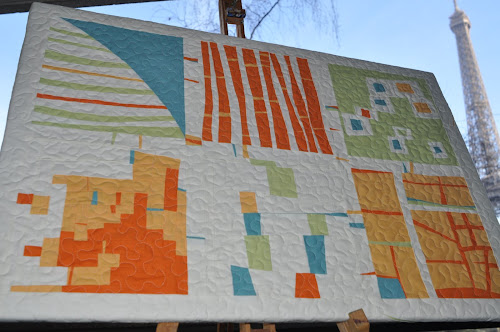
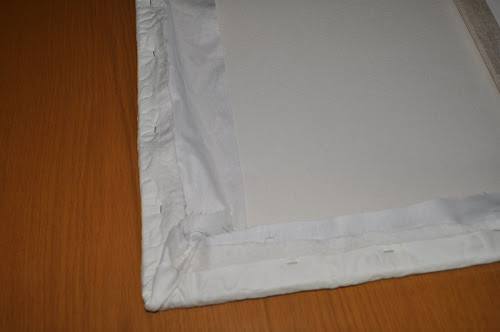
Mount on canvas
My canvas is 90 x 70 cm (about 35.4 in x 27.5 in) and as you can see in the photo, the quilt is quite a bit larger so it wraps really well around the frame. Unfortunately some of the border stripes can’t be seen. Too late for me but you could make sure that in your border you add the little stripes closer to the blocks so they show.
After carefully placing the quilt over the canvas making sure it is centred (my quilt wasn’t perfectly square so on some areas there is more border showing than in others), staple the quilt well all around the frame.
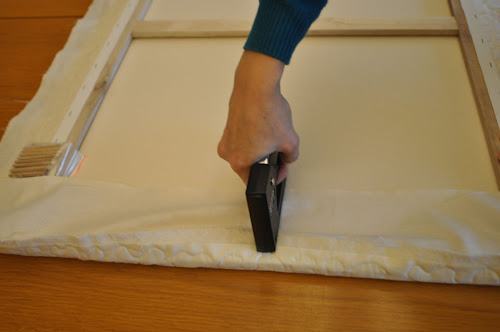
Start stapling on opposite sides first.
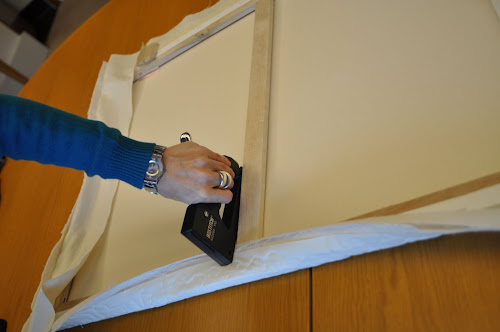
Then staple in between the existing staples.
And then each corner.
Done!
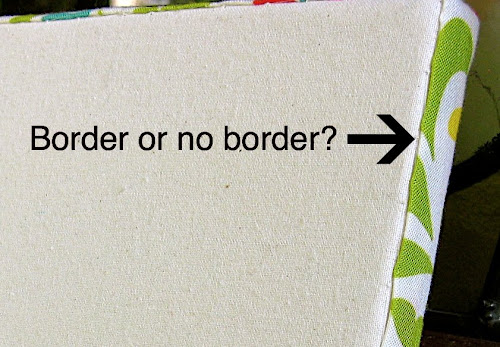
I was going to add some fabric border around the frame but I’m undecided.
And now that it is finished, I am not sure it will work well as a bed head.
My book Turnabout Patchwork
“Turnabout Patchwork. Simple quilts with a twist” is all about playing with blocks – making a block, slicing it up, and turning or repositioning the pieces to make a completely different block (sometimes two smaller blocks) to yield endless quilt tops.
- Order Turnabout Patchwork on Amazon
- Order Turnabout Patchwork directly from Martingale (e-book only)
See all the quilts in the book in a real life project

Do you wish to receive my tutorials in your inbox?
- Look for the FOLLOW button in my blog
- Subscribe to my Youtube channel
Share your work!
If you make any of my tutorials this is how you can share your pictures:
- On Instagram please tag me with @teresadownunder and hashtag #teresadownunder
- Join my Facebook group and post your pictures there
This post has affiliate links.

It looks amazing. I love seeing how you put all the blocks together and I’m super impressed that you did improv sashing too. it adds so much character to the blocks. Thanks so much for sharing your process.
LikeLike
Thank you! I was debating what to do with the sashing and border for a while but I think it turned out well overall. Each block could be a whole quilt on its own but I think that overall the blocks look fine together.
Given that the whole project was rather an improvisation from the start I’m quite satisfied with the end result.
LikeLike
This is great!! I’ve been wanting to mount pieces on a canvas for a while, so great to see a tutorial for it. Love your improv– really nice!!!
LikeLike
Absolutely STUNNING! Great choices of colour all the way through and I think it looks super mounted on the canvas frame.
Enter it in a show – looks like a prize winner from here in Oshawa, Ontario Canada.
Cheers,
Brenda J.Moore
LikeLiked by 1 person
Truly a beautiful work of art and undoubtedly a quilt! Thanks for the tutorial and the smart idea of mounting it on a canvas.
LikeLiked by 1 person
Thanks for the tutorial and the inspiration to try something like this.
LikeLiked by 1 person
Love your quilt!
LikeLiked by 1 person
Thank you for your feedback. I may not reply often but I certainly love reading what you have to say.
LikeLike
The quilt is beautiful!!! I love the colors and design.
http://blog.lulalouise.com/
LikeLiked by 1 person
Love it, I’m always looking for ideas out of the ordinary, traditional just doesn’t cut it anymore.
LikeLiked by 1 person
I love this project! It’s very different to what you normally do and it’s my favourite! Clearly improvisation works very well for your creative mind. The colours are lovely and it all just works. The random patterns flow into and out of each other. I’d have this up on a wall somewhere where everyone could see it!
LikeLiked by 1 person
I love this! When I first looked at it, I thought , Border? Sashing? Now after reading your process, I can’t not see it!
LikeLiked by 1 person
thank you so much. I now feel brave enough to start on a large piece for my wall.
LikeLiked by 1 person
I did not see the post until now when someone linked to it. I think this would be a fun mini class to have for one of my sewing groups to just get people thinking outside the box. Thanks for the tutorials.
LikeLiked by 1 person
Really nice tutorial on free hand quilt design. Beautiful and spontaneous. Thank you for taking the time to simplify what seems to be a very complicated project. It’s beautiful.
LikeLiked by 1 person
I would call this quilt “Free to be Me”. Love it.
LikeLiked by 1 person
Nice name Claudia and it reflects the spirit of this quilt so well.
LikeLike
Your work is absolutely awesome. Your great instructions make me feel i can do it. Can’t wait to try it. Going shopping today. The best teachers inspire and create confidence in their students. You are definetely in that category. Thank you.
LikeLiked by 1 person
Thank you Judith for your kind words. I’m very happy I inspired you to action. If you post some pictures of the quilt let me know. I’d like to see it. Enjoy!
LikeLike
I have been following you for some time now and this is one of my favorites. Thanks for all the great videos as well. Laura
LikeLiked by 1 person
Thank you. I’ve always wanted to make more of the improv work. It’s very liberating.
LikeLiked by 1 person