

This block and quilt couldn’t be any easier. To make the medallion mini quilt, make the tutorial 4 times:
Materials for the medallion quilt
- forty 10 inch x 1 1/2 inch strips in assorted prints or colours. Coordinate the colours and/or prints to maximise the effect
- four 10 inch squares of fabric
Tips
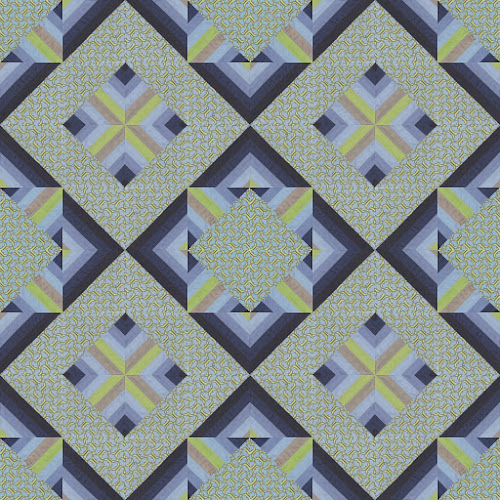
A medallion is just one of the quilt designs you can make. There’re a many other layouts that can be achieved with the 4 half square triangles that are made with this tutorial
Use high contrast fabrics for the strips. Place the darker strips on the sides and the lighter in the middle or the other way round.
As contrasting fabric you can use solids or a print fabric.
I used 10 fabric strips the same width but you can use fewer strips or strips of different widths.
Block pieces
One tutorial produces the next 4 pieces:
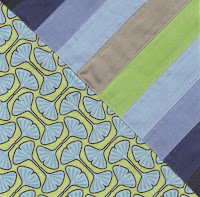


Important: Trim each piece down to 6 1/2 inch squares if necessary.
The finished block is 12 1/2 inch square.
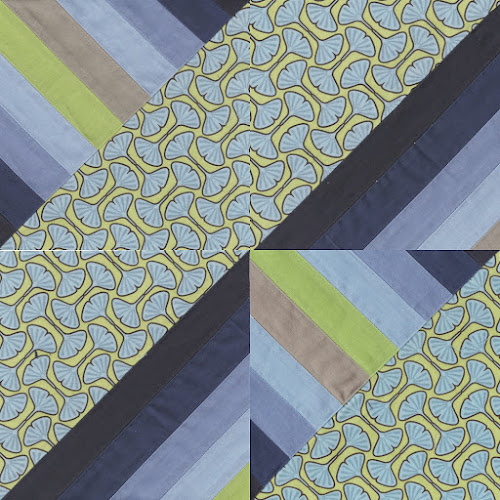
Block assembly
Quilt block
Medallion quilt
Assemble the 4 blocks as shown on the picture:
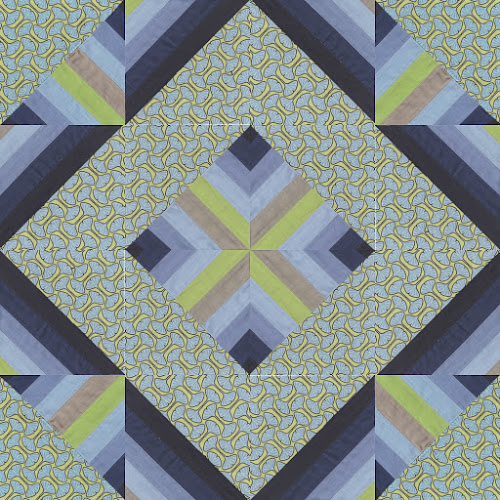
The finished quilt is about 24 1/2 inch square.
You can make this small quilt into a larger size as well:


Hi, I totally enjoy your site, tutorials and ideas. You are amazing. I like the videos, but I need to know if there is a key were I can download a printed version of the directions.for the pattern. I can watch a video but I need written instructions to follow. Thank you so much.
LikeLiked by 1 person
Thank you MaryAnn for your kind words. Sorry I don’t have step by step written instructions for my video tutorials.
LikeLike
Great block I really enjoyed making it in kids strips for a quilt for my Grandson…. it worked really well… I can follow your instructions on video & by your tutorials, so thanks
LikeLiked by 1 person
That’s great Jann. I’d love to see your quilt.
LikeLike
Hi Teresa. I just found your site this morning and like what I see. I love to quilt and have made several over the last 30 years or so. But I am on the same page as MaryAnn. Although I am able to sew without a key/photos most of the time, there are those times when it is very helpful to make sure you are getting measurements right and it looks the way it is supposed to. In addition to your video tutoring would there be a way for you to take photos or write some simple instructions (or both) to follow along with? It would really help me a lot. And many others I am sure.
LikeLike
I looked at it again and saw it very different than the first time. I can do it without a problem. But for those who are struggling a little more would there be a way to make a download/printable version for them to follow a little easier? Thank you so much. I look forward to future posts.
LikeLike