


I have a strong interest in working with fabrics and exploring different textures.
I’ve created a quilt sampler featuring 25 unique textures and a 4-patch quilt with 15 more textures or fabric manipulations. that includes 15 more textured elements. Today, I’m excited to share another fabric manipulation project, involving prairie points that have been modified to reduce bulk.
There are various methods for crafting folded stars, and this is just one of them.
It’s worth noting that making folded stars can be time-consuming, and this particular design requires hand sewing, but the end result is truly beautiful.
Here’s what you’ll need:
- Four rows of prairie points, each made from a 1 1/2 x 2 1/2-inch rectangle.
- Row 1: Four yellow prairie points
- Row 2: Eight violet prairie points
- Row 3: Eight yellow prairie points
- Row 5: Sixteen violet prairie points
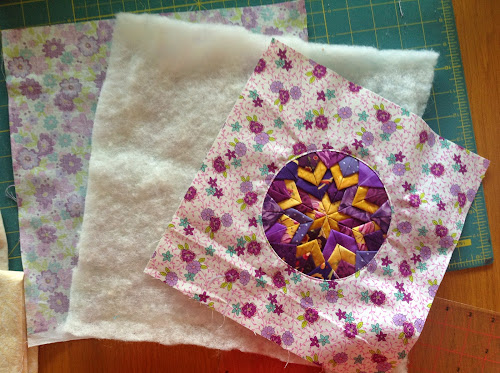
Additional materials:
- One 10″-inch” square of muslin or calico.
- Two 10 1/2″-inch” squares for the front and back.
- Extra fabric for binding.
- One 11″-inch” square of batting.
To create a modified prairie point:
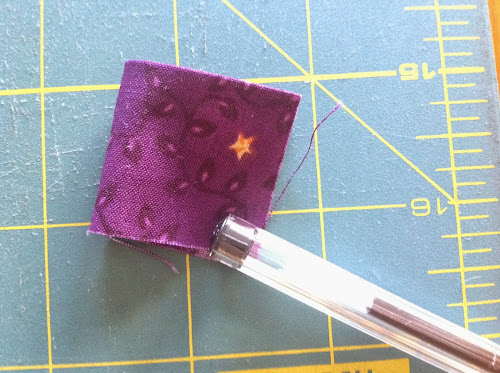
Take a rectangle, fold in 1/4″, and press it.

Fold it in half, following the picture, and press it with your finger.
Fold one side of the rectangle, as shown in the picture.
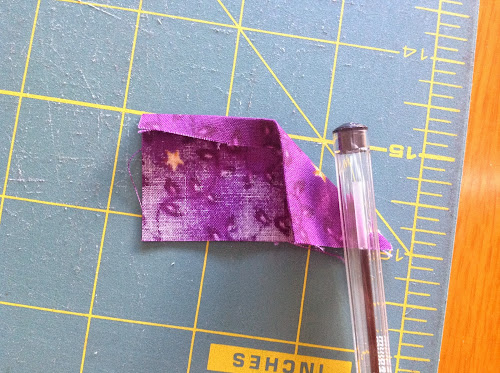
Repeat the same with the other side to create a prairie point ready for pinning.
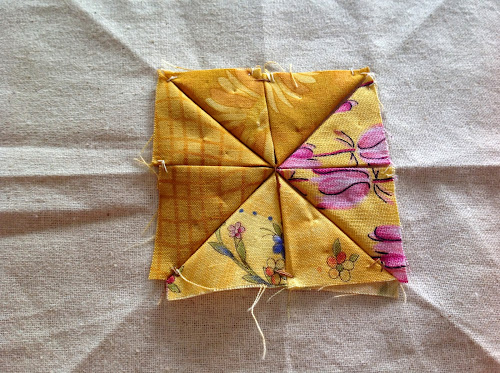
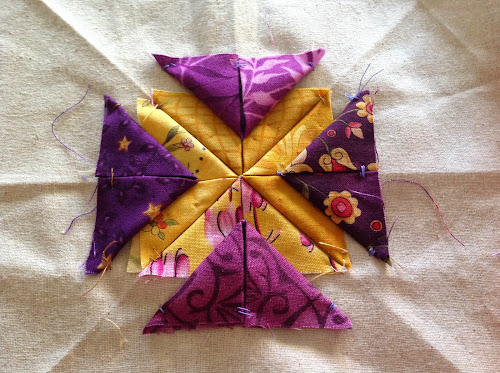
Now, let’s assemble the star:
Find the center of the muslin or calico by folding it as depicted in the picture, and press to mark the lines.
Start pinning in the center of the muslin piece.
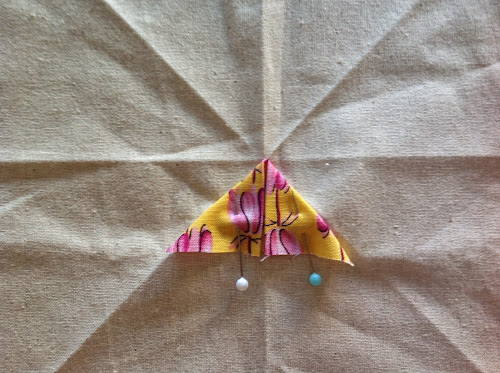
You’ll need four pieces for this row.
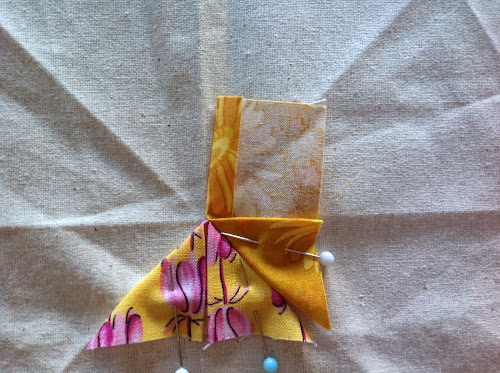
Ensure that all lines align.
Stitch all points in the middle to the calico background.
Then, stitch along the bottom, as shown in the picture.
The first row is complete.
For the second row, you’ll need eight pieces in a contrasting fabric.
Use a ruler to position them 1/2 inch below the first row, as seen in the picture.
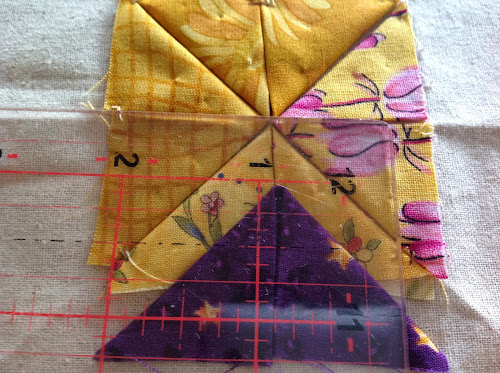
Pin them in place.
Start with the opposite pieces.
Finish with the last four prairie points in the corners.
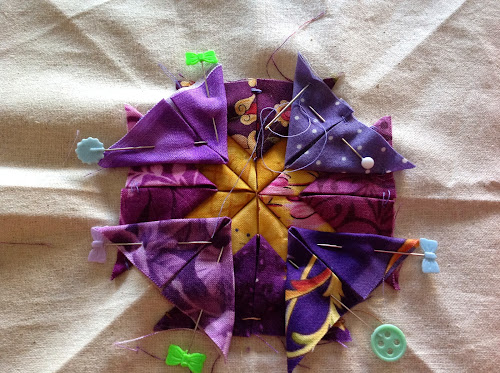
Stitch the pointy ends and the larger sides as per the picture.
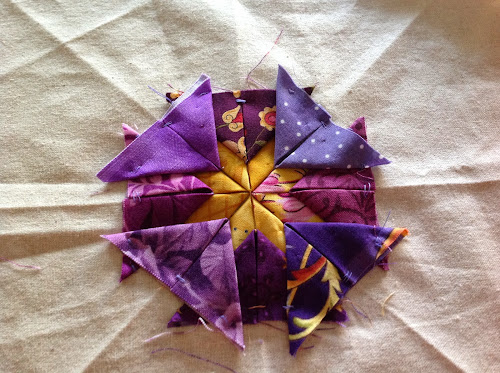
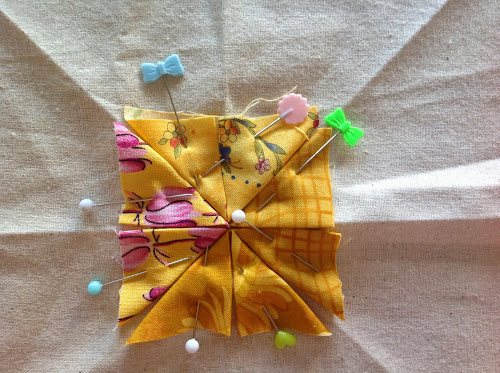
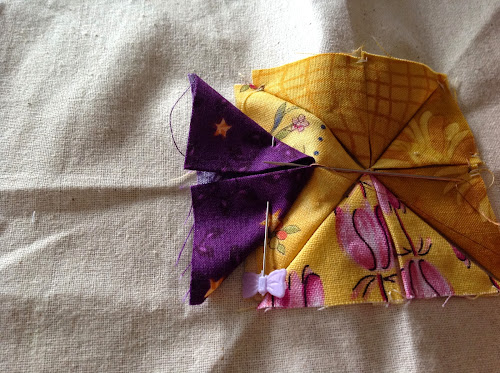
For next row you will need 8 prairie points again.
For the next row, you’ll again need eight prairie points. Proceed as you did in the previous row, placing them 1/2 inch from the previous row, pinning, and stitching.
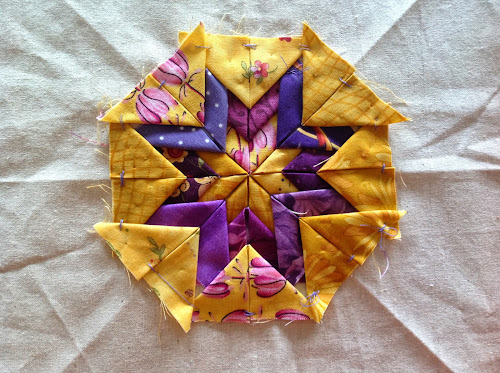
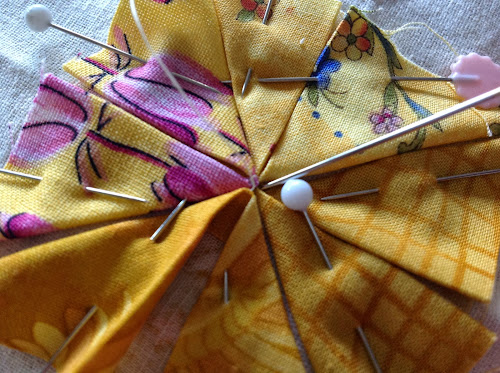
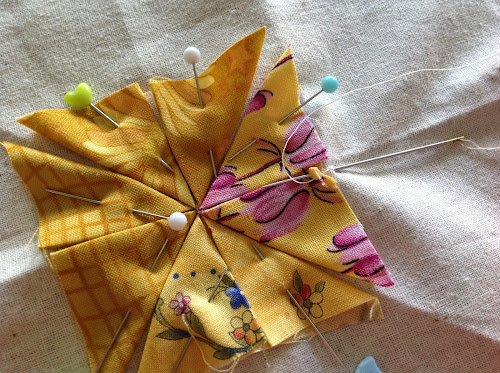
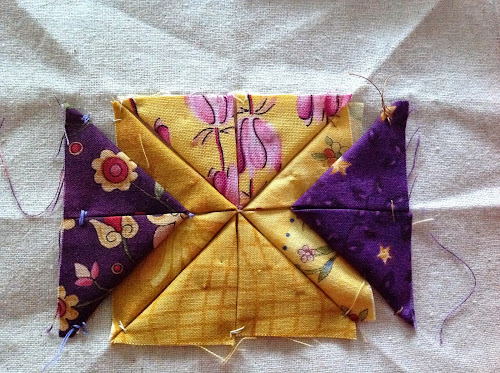
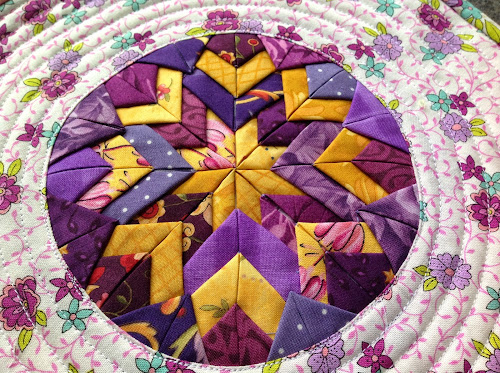
The last row requires 16 prairie points. Place them as in the previous row and add eight more prairie points, overlapping as shown in the picture.

Stitch the pointy ends and the larger edge to the calico.
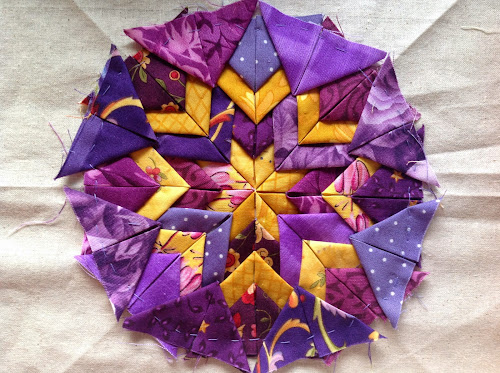
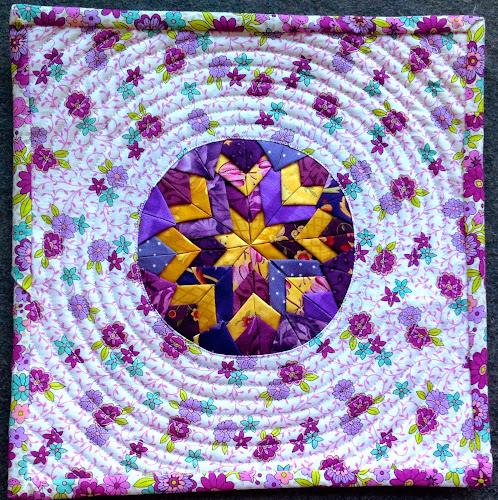
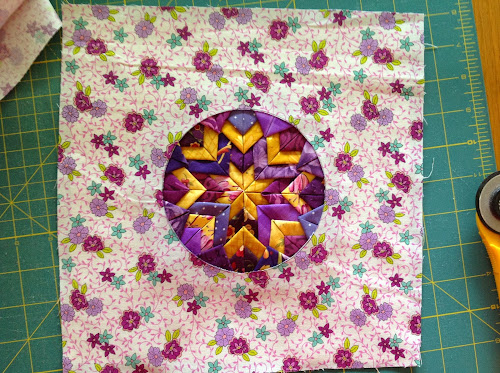
Your folded star is now complete.
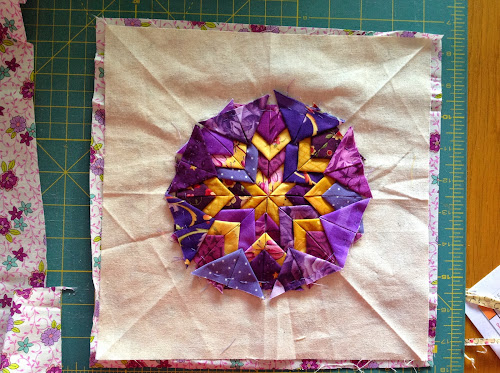
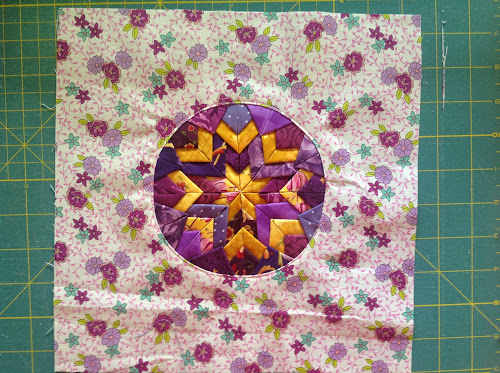
To finish it off, take the 10 1/2″ square and create a circle smaller than the folded star.
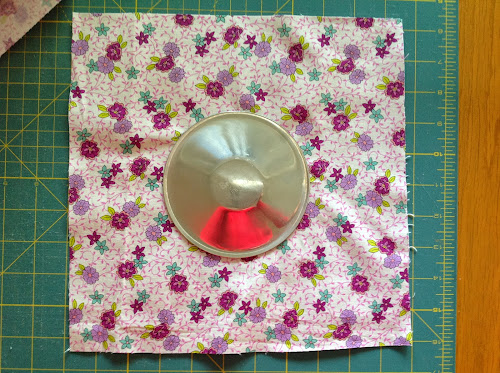
Draw your circle, place it over the folded star, and cut along the circle.
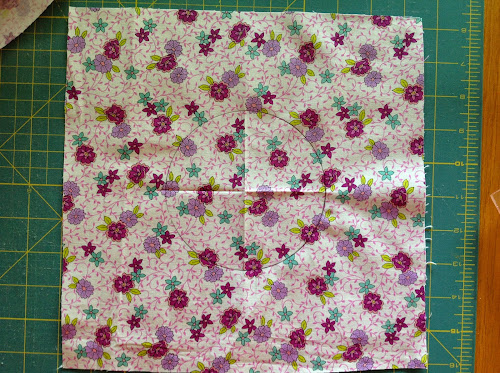
Fold the fabric about 1/8″ all around the circle and pin it.
Topstitch as close to the edge as possible. Trim the muslin to reduce bulk.
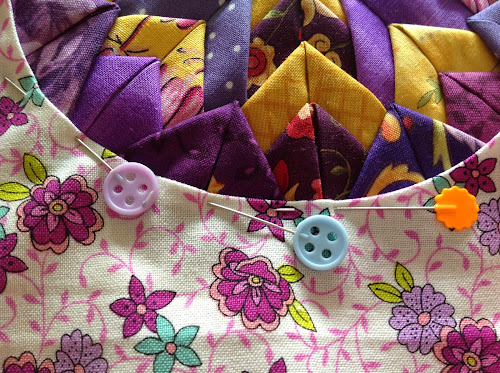
Top stitch as close to the edge as possible.
Trim the muslin to reduce bulk.

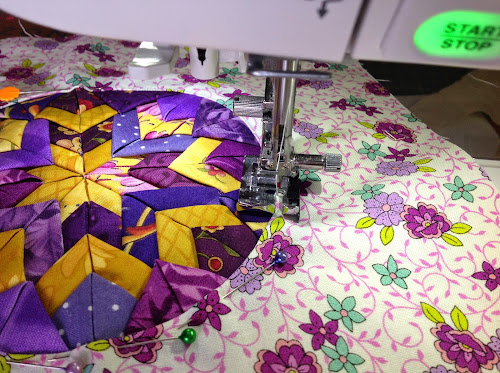
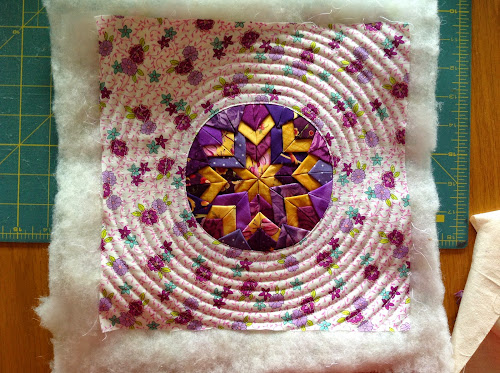
Now, create a quilt sandwich by placing the backing wrong side up, the batting, and the folded star on top.
Pin it securely.
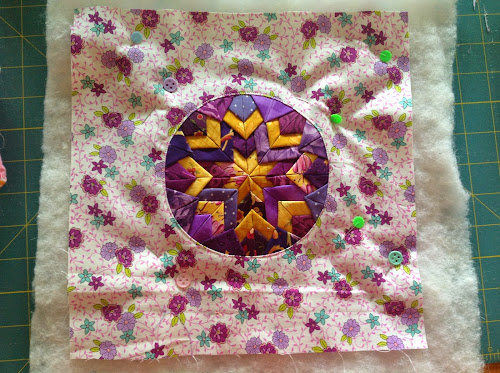
Quilt in circles using the edge of your machine’s foot as a guide.
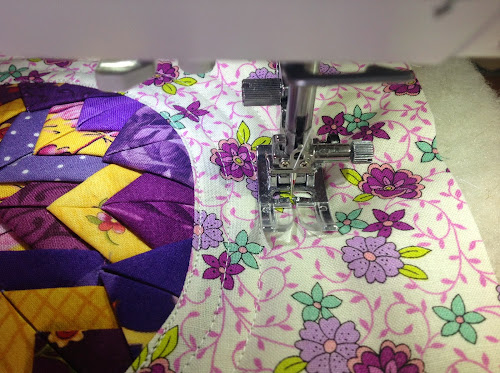
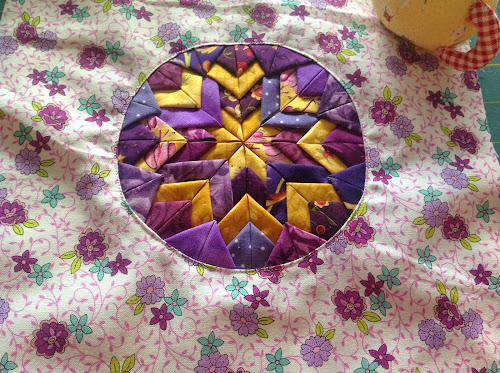
Trim off any excess batting, and you’re ready to add the binding.

Ready to add binding.
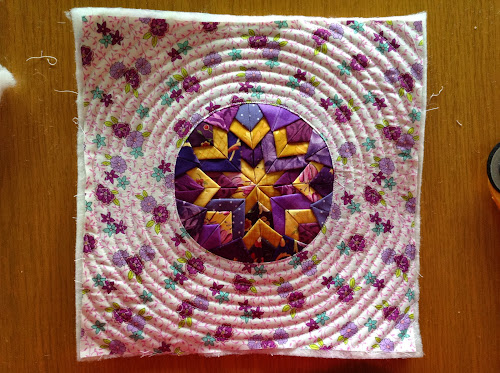
Voilà! Your folded star fabric project is complete.

Love this. My friendship quilt group is having a potholder exchange and I’ve been looking for cute ideas for my potholders. Viola! I love your 3D patterns and the paper piecing you’ve been posting. My favorites!
LikeLike
So pretty….I wouldn’t want anyone to use it! Your work is always inspiring. Thanks so much for such clear instructions. Cheers, from Oshawa, Ontario, Canada
LikeLike
Thank you!
LikeLike
Wow – just gorgeous! Thank you so much for the tutorial!
LikeLike
Hi I have a question do we cut the circle?
LikeLike
Tracy, you´re right, the cutting step is missing. You need to cut a circle. I´ll fix asap.
LikeLike
Nice tutorial. Thank you. I was wondering how to do that.
LikeLike
¡ Es precioso! Gracias por el tutorial.
LikeLike
Preciosa, divino los colores, muchas gracias. Un abrazo desde Colombia
LikeLike