

I made this quilt with improv quilt-as-you-go. You can see a video below that demonstrates the technique.
I didn’t use a backing fabric for my panels which I’m not sure was a good or bad idea. I wanted to use lining with a pocket so I thought I’d skip the backing.
Bag sides
- 2 pieces of batting measuring 15 x 15 1/2 inches
- fabric scraps
Side of bag
- 1 strip measuring 42 x 3 1/2 inches
Closure
- 2 pieces measuring 4 1/2 x 5 1/2 inches of contrasting fabric
- 1 piece the same size of medium weight fusible interfacing
Strap
- 1 strip measuring 26 1/2 x 1 7/8 inches of fabric for the inside of the strap
- 1 strip measuring 26 1/2 x 2 1/2 inches from the same fabric as the side of the bag
- 1 strip of medium weight fusible interfacing measuring 26 1/2 x 1 1/2 inches
Lining
- 2 rectangles of cotton fabric measuring measuring 14 1/2 x 15 inches
Other
- a magnetic snap closure
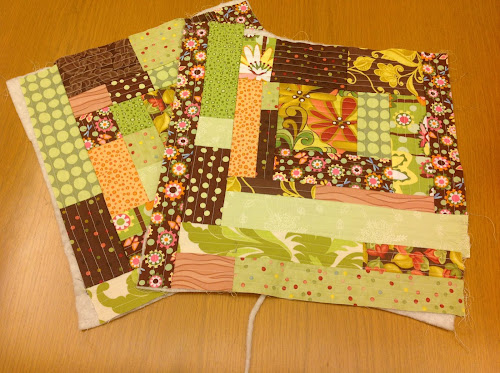
Making the quilt-as-you-go improv patchwork bag panels
The bag is not square but I started with slightly larger rectangles of batting to allow for trimming.

From now on freely choose scraps of fabric and add to the batting quilting as you go.
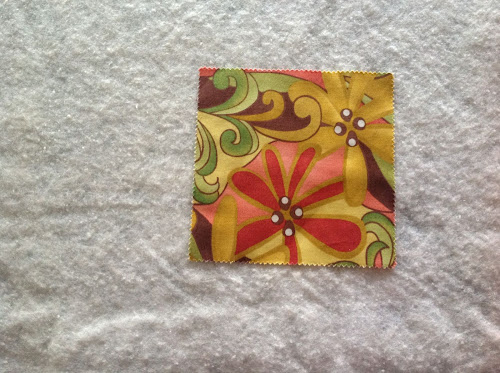
The first piece is different to the others. Just quilt the piece.

No need to worry about the raw edges as they will be covered with subsequent pieces.

Now, measure the width of one side of the starting piece, mine was 5 inch square. Cut another piece that is the same width and place it on top with right sides facing together.

Stitch on the edge leaving a 1/4 inch allowance.

Just fold the piece over and quilt it like you did with the first piece.

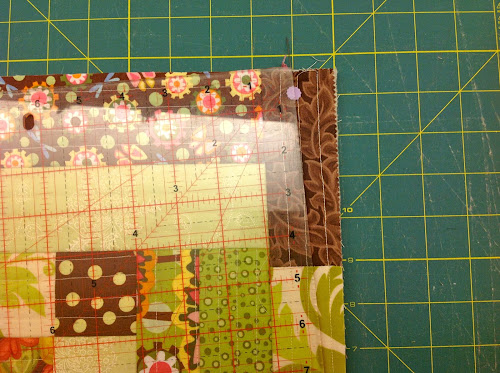
How to work out the size of the next piece quickly
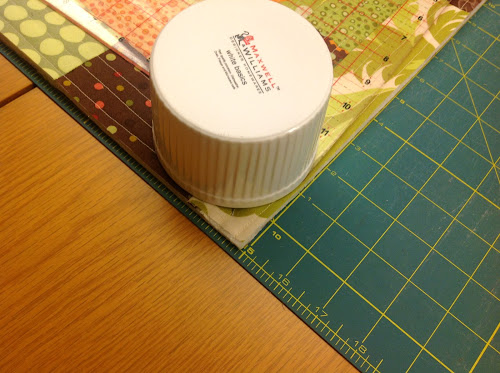
When you do this sort of improv patchwork you don’t know the size of the next piece to cut. This should be a no brainer. Use your ruler as per photo to measure the length of the next piece and cut the width any size you like.
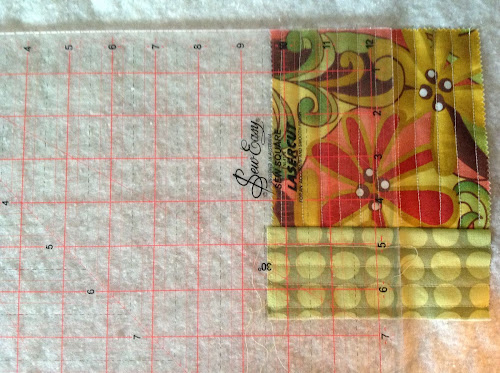
You can cut it slightly longer if you like. It doesn’t matter as the next piece will hide the longer edges.

And so on.
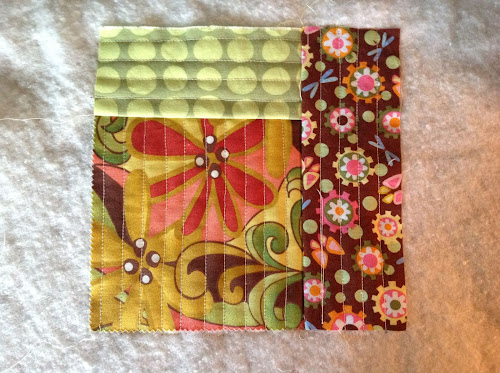
You can use 2 strips pieced together beforehand.

How to work out quickly how much fabric you need for each piece when using more than one fabric in the strip
As you piece grows you can use more than piece of fabric to make the strip.
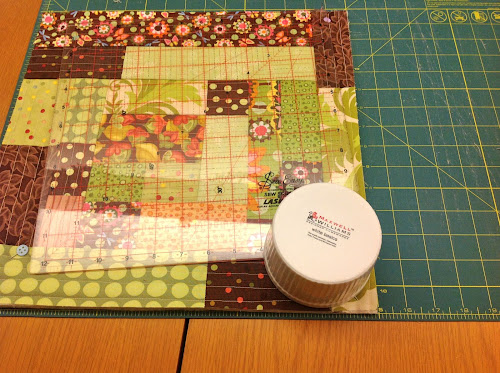
Cut a piece, then place it on the batting, place the ruler as per photo adding 1/4 inch at the end, e.g. A is 3 3/4 inches in this case, B is always 1/4 so you need to cut a 4 inch piece.

If using straight lines quilt in the direction of the last strip added.

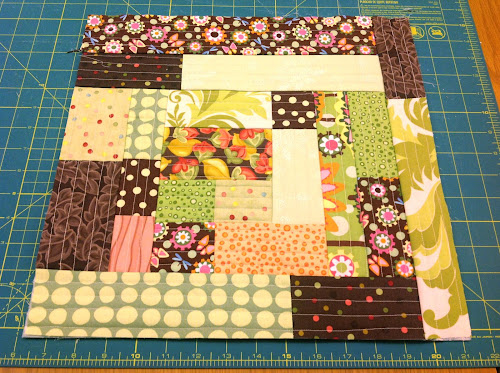
The first panel is done. The batting lost some of its shape. This probably wouldn’t have happened if I had used a backing fabric. It didn’t matter because I had made some allowances for shrinkage.

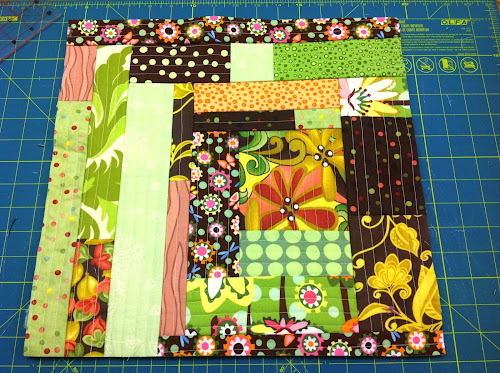
Do the next panel in the same way.

Both panels are done now.
Trim to to 14 1/2 x 15 inches.
For accuracy use the trimmed panel as template to trim the second panel.

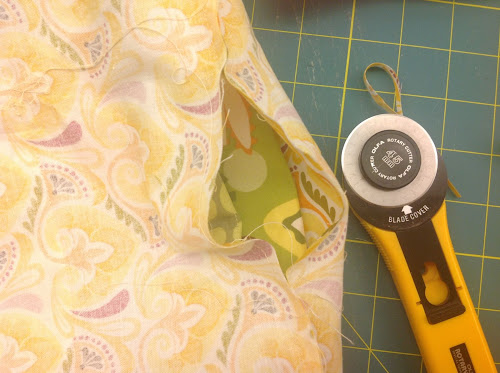
Give the bag some shape
I’m going to show you how I used unorthodox methods to cut the panels of the bag using a quilter’s ruler and kitchenware.
Take a 12 1/2 inch ruler and place the top edge at 1 inch from the panel’s edge (see picture). Then move the bottom of the ruler at an angle towards the edge of the bag until it reaches the end of the panel. Cut off the side of the bag following the ruler’s edge.
To make a round corner, I took a 4 inch wide ramekin and placed it on each bottom corner of the panel.
Then I drew the shape.
Place panel over panel with batting side facing together and pin.

Cut around the marked curved line.

Do the same on the opposite side.

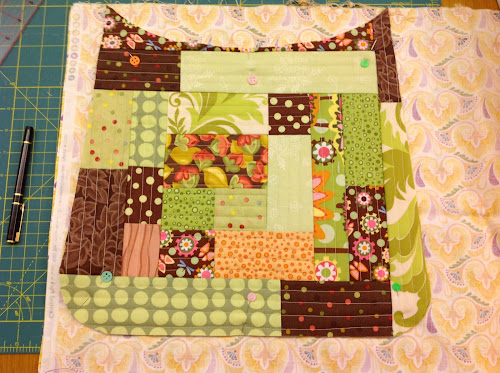
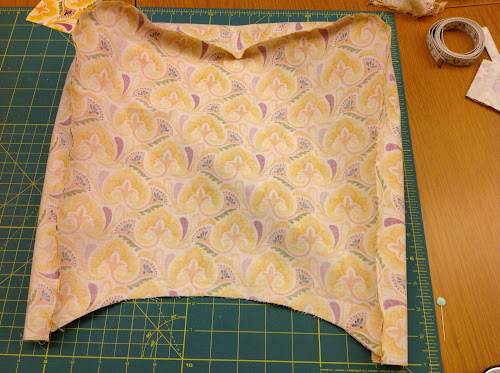
Now let’s cut the top of the bag into a curve.
Fold the panel as per picture to make the curve symmetrical.

Use an oval plate to cut the top. Centre the oval plate on the panel’s fold at about 2 inches from the panel’s top.

Draw around the oval dish.

Pin before cutting so the fabric won’t move.

Cut along the line.

Now place the cut panel over the other panel, pin, and use as a template to cut the other side.

The depth of my curve is 2 inches.

Making the lining
Fold the lining fabric right side facing together as per picture.

Place panel on top to serve as a template.
Cut the two pieces of lining.
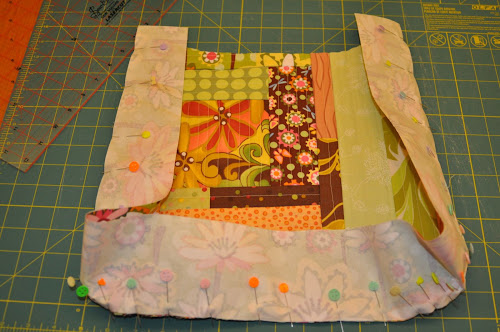
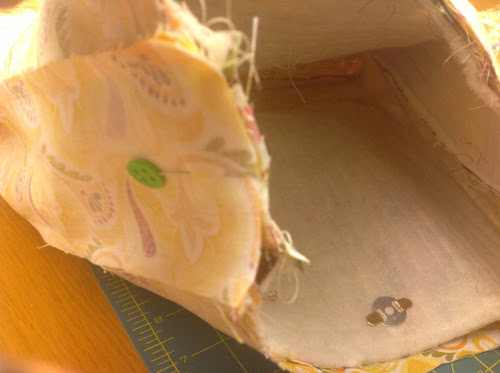
Adding pockets to the lining
Do this before you stitch the lining to the sides.
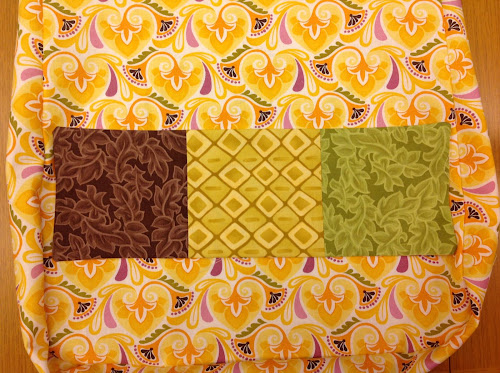
I made the pocket using three 5 inch charm squares stitch together and a strip of lining fabric for the back. I made a tube and turned inside out. Then I stitched around 3 sides and on each seam making 3 pockets.
Attach the lining side strip to the sides of the lining. See below how to cut the lining side strip.
Leave a 3 inch opening on the bottom of one of the panels to turn the bag inside out once the lining is attached.
Bag and lining side strip
The panels are attached to each other via a strip and so is the lining. The strip is narrower on both ends.
Do the following for the lining as well though skip the fusible interface for the lining.
Cut a 42 x 3 1/2 inch strip of fabric and another of fusible interfacing. Fuse the interfacing to the strip.
Then, as you did with the sides of the panels, trim each end.
Start by placing your ruler 1/2 inch from the top edge.

Then move the bottom of the ruler to the edge of the strip as per picture and cut.

Do this on both sides.

Then do the same at the end of the strip.

Attach the strip around the panel as per picture. You may need to trim the end off a bit.
Stitch around it carefully around the corners.

Do the same to attach the other panel.
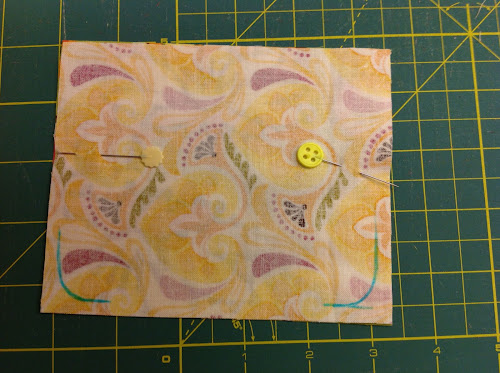
Making the closure
Cut 2 fabric rectangles and one fusible interfacing rectangle measuring 4 1/2 x 5 1/2 inches. Fuse the interfacing to the wrong side of one of the fabric rectangles.

Find the middle of the flap and mark a poing at 1 1/2 inches from the edge.

Attach a magnetic snap closure as per manufacturer’s instructions.

Now place both rectangles with right side facing together and draw two rounded corners on the bottom edge. The bottom edge is the edge where the snap closure is closest to.
Stitch around the edge leaving 1/4 inch allowance and around the drawn corners. Trim the corners and make some nips so that when turning around the corner is crisp.

Iron flat and top stitch very close to the edge.

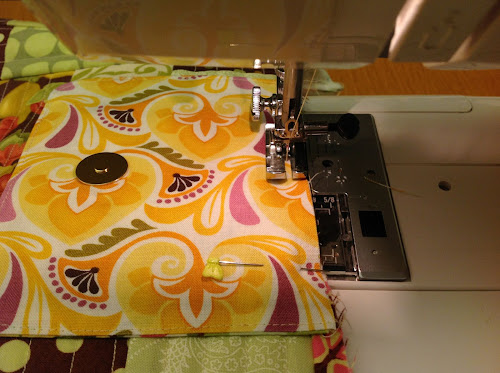
Centre the flap on one side panel as per picture.

Stitch along the top.
The flap is ready.

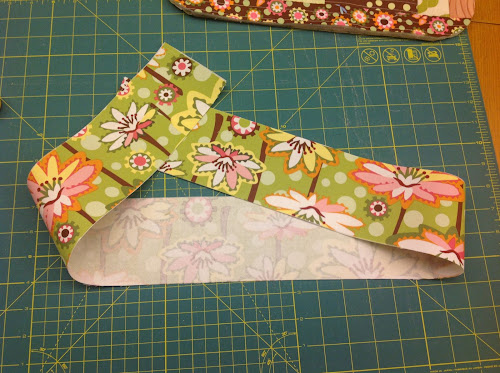
Making the strap
This strap uses two strips, one larger than the other, so that the inside of the strap has some outside fabric showing on each edge. It’s easy to do and it gives are more careful finish look to the bag with little effort.
Cut
- 1 strip measuring 26 1/2 x 1 7/8 inches of fabric for the inside of the strap
- 1 strip measuring 26 1/2 x 2 1/2 inches from the same fabric as the side of the bag
- 1 strip of medium weight fusible interfacing measuring 26 1/2 x 1 1/2 inches
Fuse the interfacing to the narrower strip of fabric.

Now stitch the strips together.
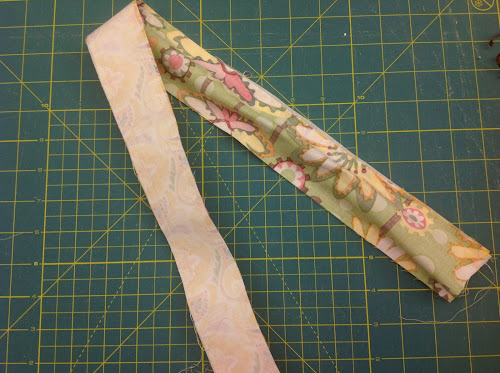
Turn inside out. Iron flat making sure the larger fabric overflows on both sides of the narrower strip.
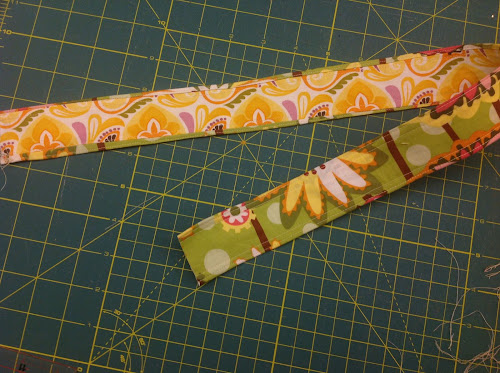
Top stitch very close to the edge and then at 1/4 inch from the edge.
Now pin the strap to the sides of the bag as per picture. Leave 1/2 inch allowance to the strap.

Attaching the lining
Place the bag inside the lining with bag and lining right sides facing together.

Pin all around the top.
Stitch around the top edge.
Find the opening in the lining.
Turn the bag inside out through this opening.

Topstitch opening.

Put lining inside the bag.

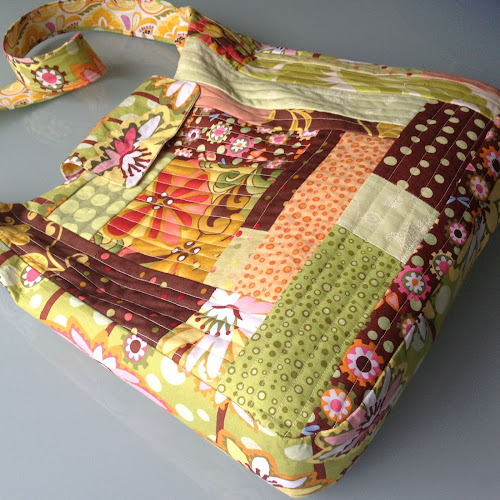
The bag is finished.

You can reinforce the stitching of the strap by topstitching along the strap seam using a decorative stitch.

Detail of the strap.


Great demo! Good commentary and pictures. Inspires me to go ahead and do my own thing too! Thanks and keep it up!!
LikeLike
I too think this is a great demo! I’ve always wanted to make a bag such as this, and quilt-as-you-go is ideal for this project. You’ve inspired me to make a bag from my quilting stash. I also liked your “unorthodox” methods for cutting shapes. Having done similar throughout the years, I prefer to think of it as a “creative use of resources.”
LikeLike
Fabulous bag… love it…. Hugz
LikeLike
This is a great bag. Thanks so much for the tutorial!
LikeLike
Fantastic, well-written tutorial! The finished bag is adorable – love it!
LikeLike
What a great tutorial with very good step by step instructions. Thank you very much. LOVE the bag.
LikeLike
Interesting, beautiful. What a lovely bag to have!
LikeLike
Awesome tutorial! I can’t wait to get started! THANK YOU for sharing!!!
LikeLike
Great tutorial! I have made a lot of bags and done a lot of quilt as you go but never thought of doing a bag quilt as you go. Thanks!
LikeLike
I am not sure if you “accept” awards. However, I just wanted to let you know I nominated you for 2. The Very Inspiring Blogger and One Lovely Blog Awards. To find out more you can go to my post for today and check it out. Thanks for being such a wonderful Blogger. (PS I just referenced this great tutorial. You make it look so easy!)
LikeLike
Very nice tutorial. I love the bag and your colors!
LikeLike
Love, love, love your bag! Thanks for the great tutorial!
LikeLike
Great tutorial!!Fantastic!! Thanks!
LikeLike
Thank you soooo much for taking the time to make this great and detailed tutorial!
LikeLike
Es impresionante!!!!!
Gracias por compartir!!!!
LikeLiked by 1 person
I too appreciate your wonderful tutorial and will definitely be making one to carry my things to work. Can I clarify a step in the tutorial? In the section titled ‘Let’s give the bag some shape’ you talk about taking “a 12 1/2 inch ruler and place the top edge at 1 inch from the panel’s edge (see picture). Then move the bottom of the ruler towards the edge of the bag until it reaches the end of the panel. Cut off the side of the bag from the top of the ruler to the top.”
Do you mean “cut off the side of the bag from the top of the ruler (one inch in) angling out towards the outside bottom corner of the bag” ? I’m confused by cut off the side of the bag from the top of the ruler to the top… top what?? 😉
thank you!
LikeLiked by 1 person
Michelle, thank you for spotting the error. The picture shows you though what I meant. It should read exactly as you rephrased it.
LikeLike
great, thank you for the quick reply 😉
Michelle
LikeLike
Lo quiero en español
LikeLike
Puedes utilizar traductores en linea.
LikeLike
the batting measures 15 x 15 1/5″ ? a 1/5 ??? i never heard that measurement before. i am going with 15 1/2″
LikeLike
My mistake eileensideways. It should be 1/2 instead of 1/5 like you guessed.
LikeLike
I have never made a bag but when I do I am going to try your way. Looks like fun and you made the directions easy!
LikeLike
Very nice! Thank you!
LikeLike
Thank you for the tutorial. I used its patchwork technique on a recent project, and I love it. So efficient. One of these days, I’m going to actually make a bag.
LikeLike
I think I’ll have a go at this next, ok, _after_ I’ve made the wallets for my nephews (all three of them). But I might use fusible batting/fleece in the strap instead of interfacing. I find that having a slightly padded strap just look “right” with a quilted bag..
LikeLike
Maybe I should have mentioned, I’ve got to get the wallets done so my kids (adults now) can deliver them, with the bags for the nieces, when they head off to Perth for Xmas 🙂 I have until the end of November to get all Xmas sewing projects finished!
LikeLike
Gorgeous bag! Thanks so much for the detailed tutorial.
LikeLike
I first learned the QAYG method from a Craftsy class with Tara Rebman, making a very large tote. I like the size of your bag for everyday use but I want a sturdier bag so I would probably use Tara’s method with utility cloth and batting. Thanks for a good pattern and tutorial.
LikeLike
For the first time I understand ‘quilt as you go’! My brain is now tripping on high speed as I think of the fabrics I have, the friends I want to make a bag for and which fabrics are best for which friends. Thank you!
LikeLike
Just finished making this bag! The tutorial was PERFECT for a beginning sewer! Thanks so much! I love it!
LikeLike
This is an excellent tutorial with clear understandable instructions. I am certainly going to make the bag.
LikeLike
This pattern was fabulous and very easy to follow. Thank you Teresa for taking the time to post it – and free of charge. You are amazing!!
LikeLike
Thank you Sue!
LikeLike
If you’ll use iron on stabilizer on the back of the batting before you start assembling, it will prevent the batting from losing shape.
LikeLiked by 1 person
That’s a great tip Sandy. Thank you for sharing.
LikeLike
Teresa…thanks for the great bag pattern. I am making in right now. I was just wondering, is the bag supposed to be taller rather than wider? I am getting ready to make the angled cuts on the side of the bag and I am not sure whether to trim the 15″ sides or 14.5 inch sides.
LikeLiked by 1 person
That’s a good question. The bag is slightly taller than wider but as you can see not by much.
LikeLike
Love your bag! What is the fabric line that you have there?
LikeLiked by 1 person
Hi Fizzle, I used many fabric scraps from different ranges and designers from a few years ago. I don’t remember the names sorry.
LikeLike
Where have I been and where was I when this tutorial was published? This is one sweet, cute little bag. So glad I found it; so glad you shared it. Thanks, Teresa. On my to-do-list.
LikeLike
Teresa: After looking at the video, this seems familiar. Could I be slipping? Love the QAYG.
LikeLike